How to Add Team Members

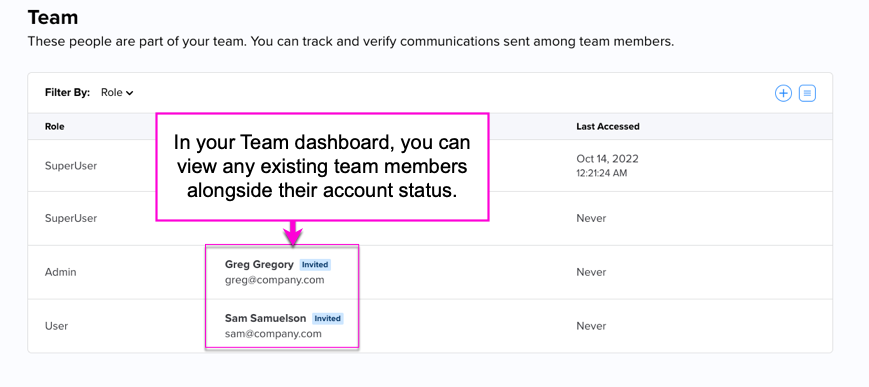
Having a verified team adds a layer of security to secure communications by authenticating the identity of the communicating parties. It also helps identify external communications of sensitive material. Team members will be able to access and send information securely, all while being recorded through the XQ Dashboard.
If you have not yet created a team, see Creating and Managing Teams for more information.
SuperUsers and Admins can add team members individually from the Dashboard or in bulk with a CSV file. This article provides steps for adding team members.
Add Individual Team Members
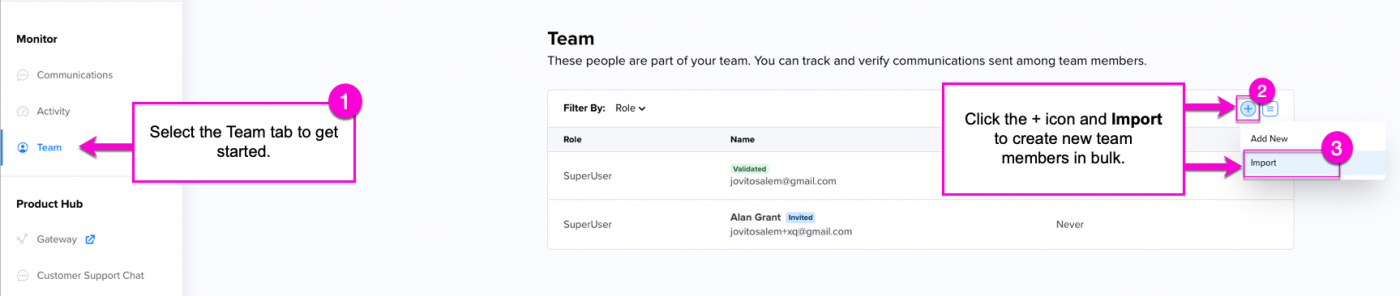
Step 1: Open the XQ Dashboard and click Team from the navigation bar.
If you are not currently viewing the correct team, click on your team menu in the top-right corner of the dashboard to select the right one.

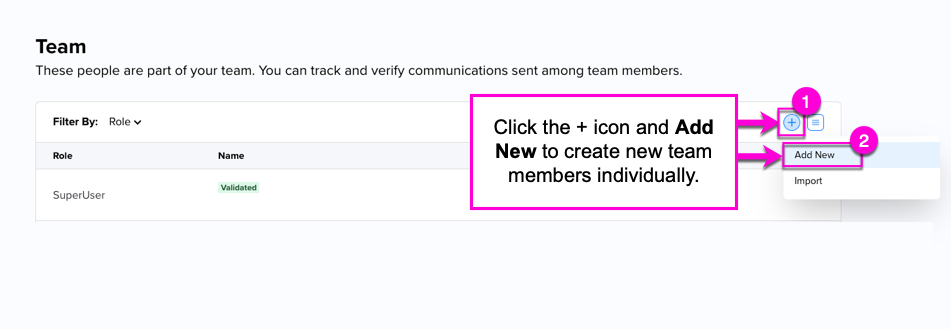
Step 2: Click the + icon on the top-right corner above the existing team member list. Then, click Add New.
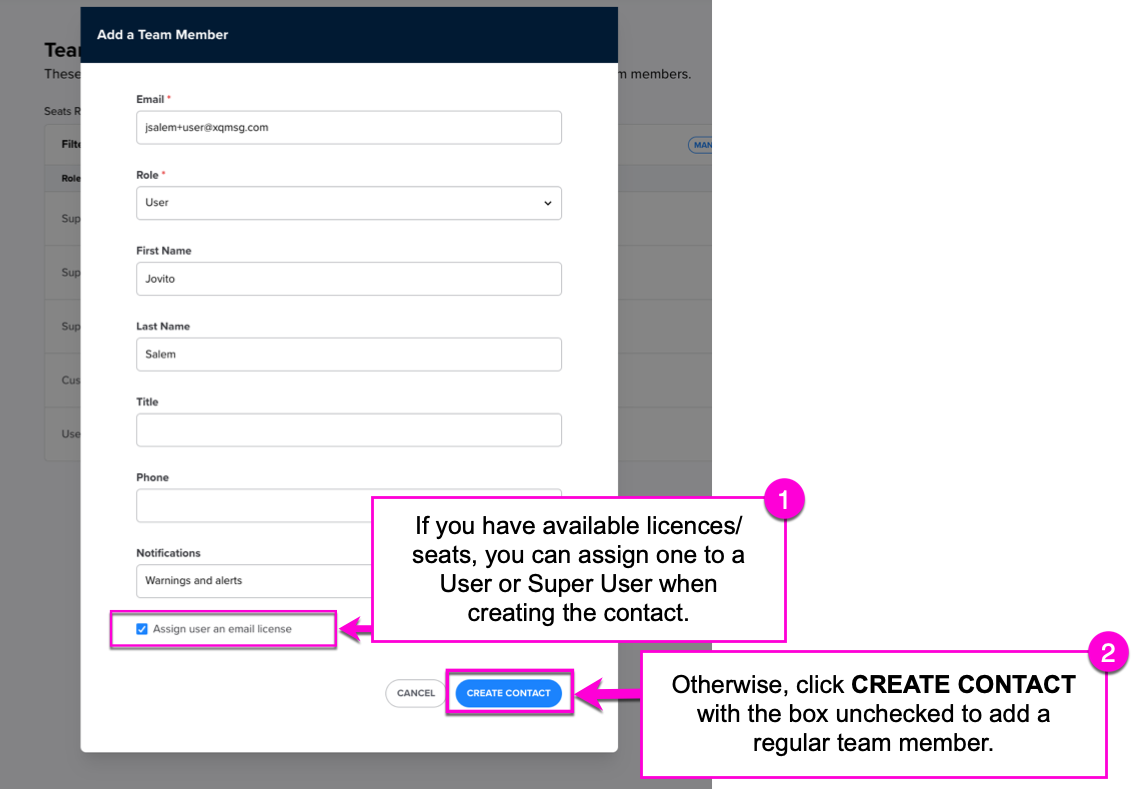
Step 3: Fill out the form and choose one of the pre-defined roles from the dropdown list. For more information on the available user roles, Team Member Roles and Privileges.
Click CREATE CONTACT to then trigger a confirmation email to your newly added Team Member.
Note: At this point, if you have available seats in your account, you can click the Assign user an email license checkbox to assign one of those seats to any User or Super User.
To learn more about assigning licenses to an account, check out THIS article.
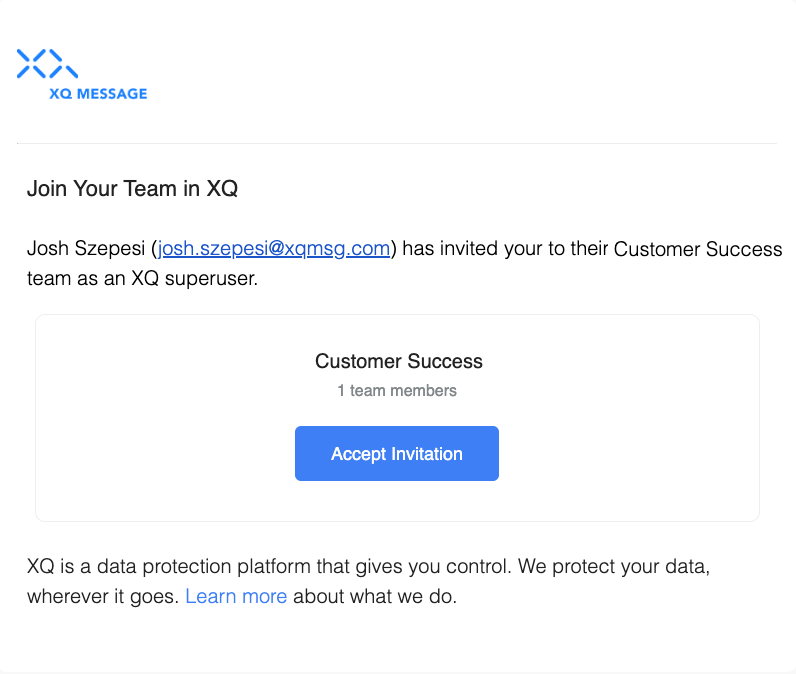
Your newly added team member will now receive an email asking them to accept the invitation. Once they accept, the process is complete.
Add Team Members in Bulk
Step 1: If you would like to bulk upload contacts, navigate back to the Team tab in the left menu bar. Then click the + icon in the top-right corner above your existing team member list. Click Import.
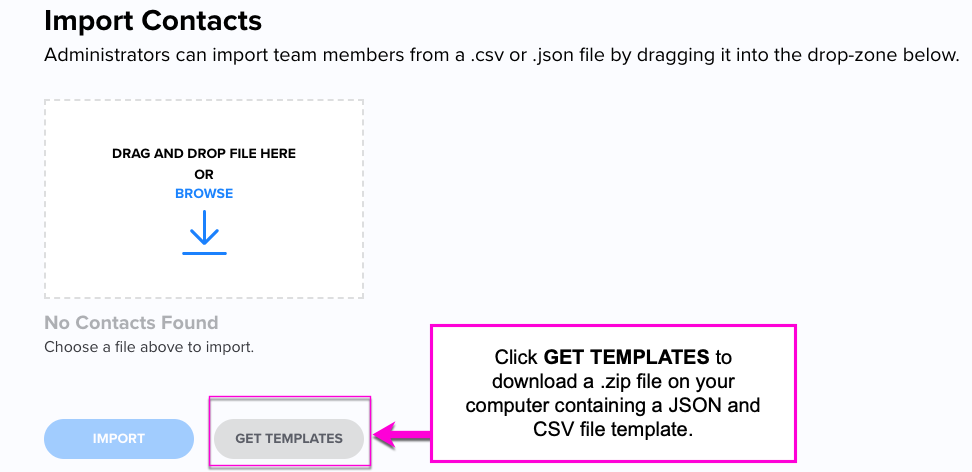
Step 2: Click GET TEMPLATES to download the JSON and CSV file templates required to bulk upload contacts.
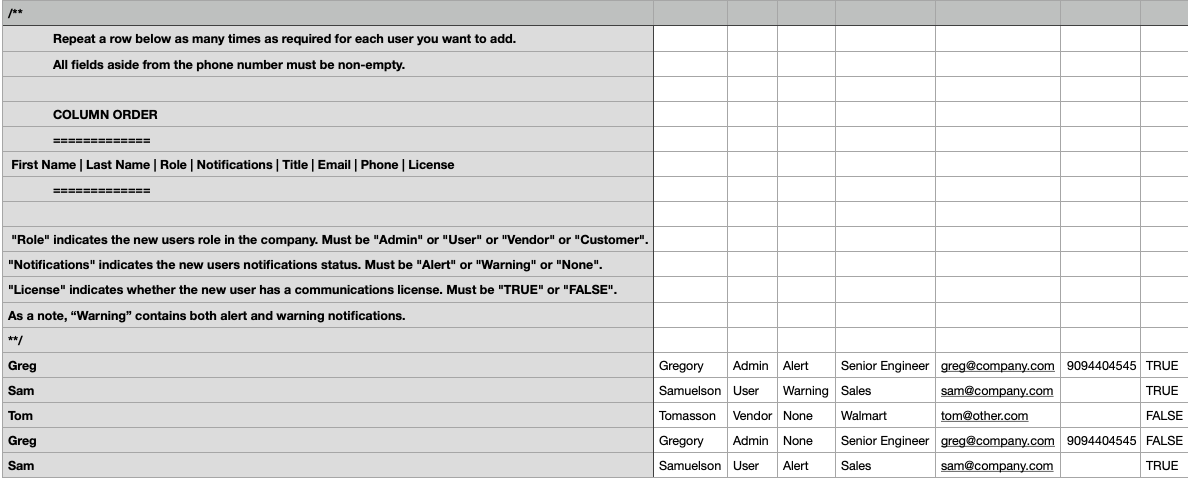
Step 3: Open one of the templates from your local file system and input your team members' Emails, First Names, Last Names, Roles, Notifications, Titles, and Phone numbers.
The file will contain instructions and demo users showing how to format your team members in the spreadsheet. The following screenshot shows an example from the .csv file:
Step 4: Once you have populated the spreadsheet, drag and drop the file into the drop-zone or browse for it in your file folder.
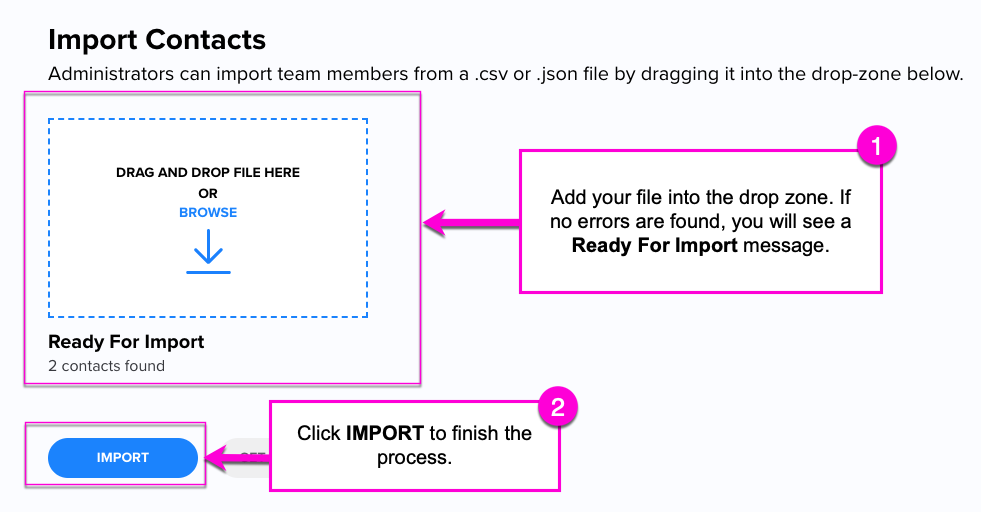
All invited team members will receive an email asking them to accept the invitation. You can view their status in the dashboard by navigating back to the Team section.