

How to Encrypt a File

XQ provides Zero Trust encryption so you never have to worry about data leaks and you can feel confident your files reach the recipient securely. This article provides steps for encrypting a file from the XQ Dashboard.
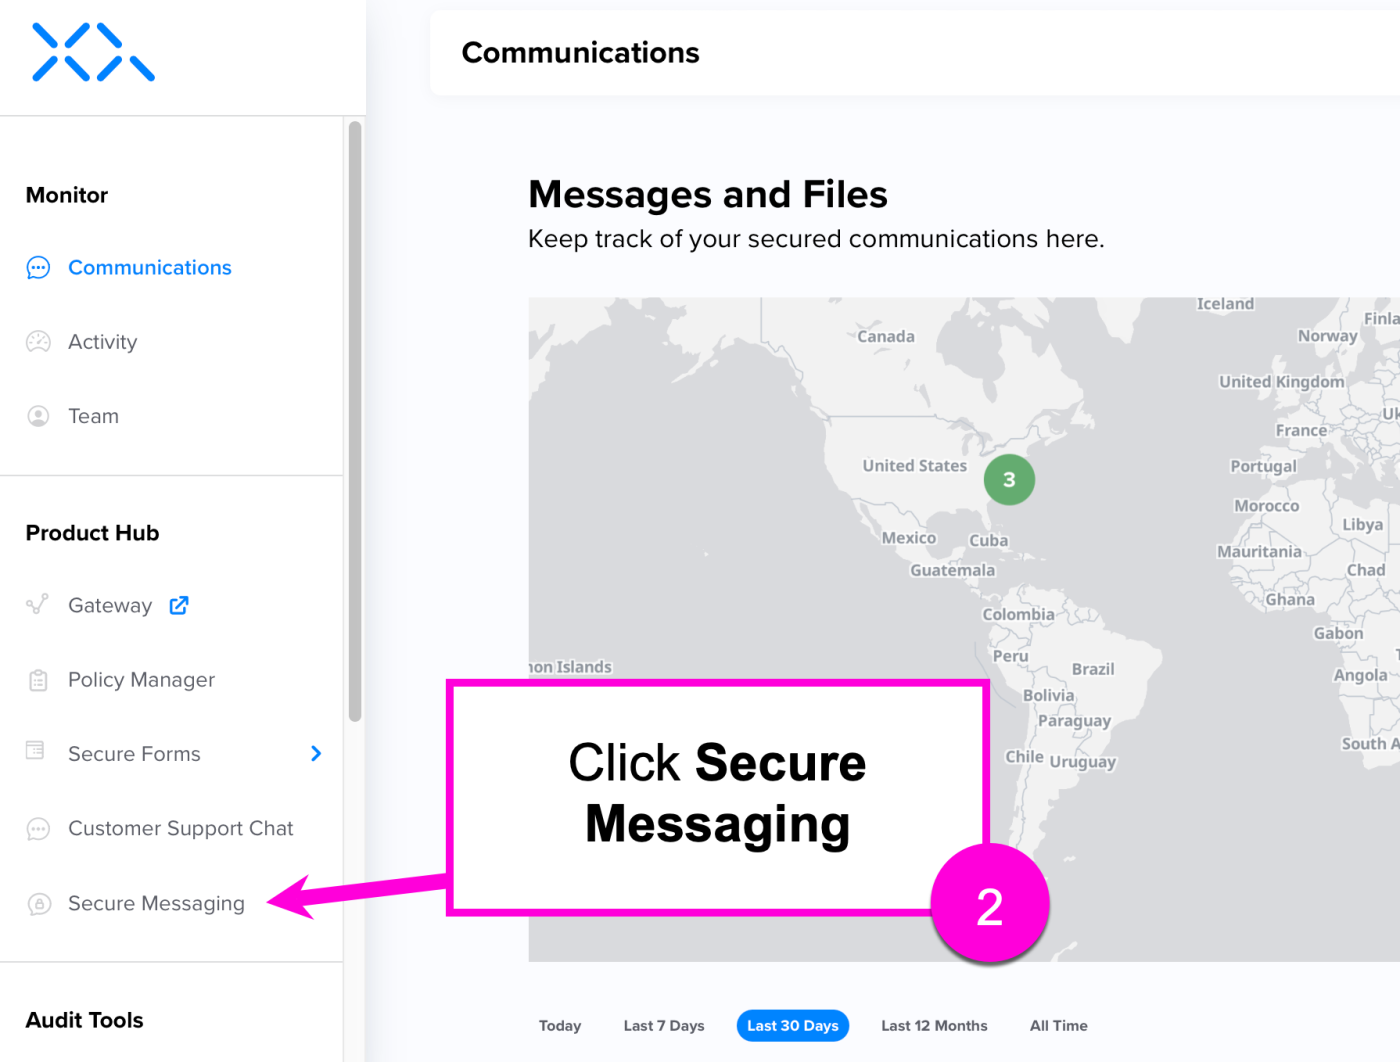
Step 1: Log in to the XQ Dashboard.
Step 2: From the Product Hub menu, click Secure Messaging.
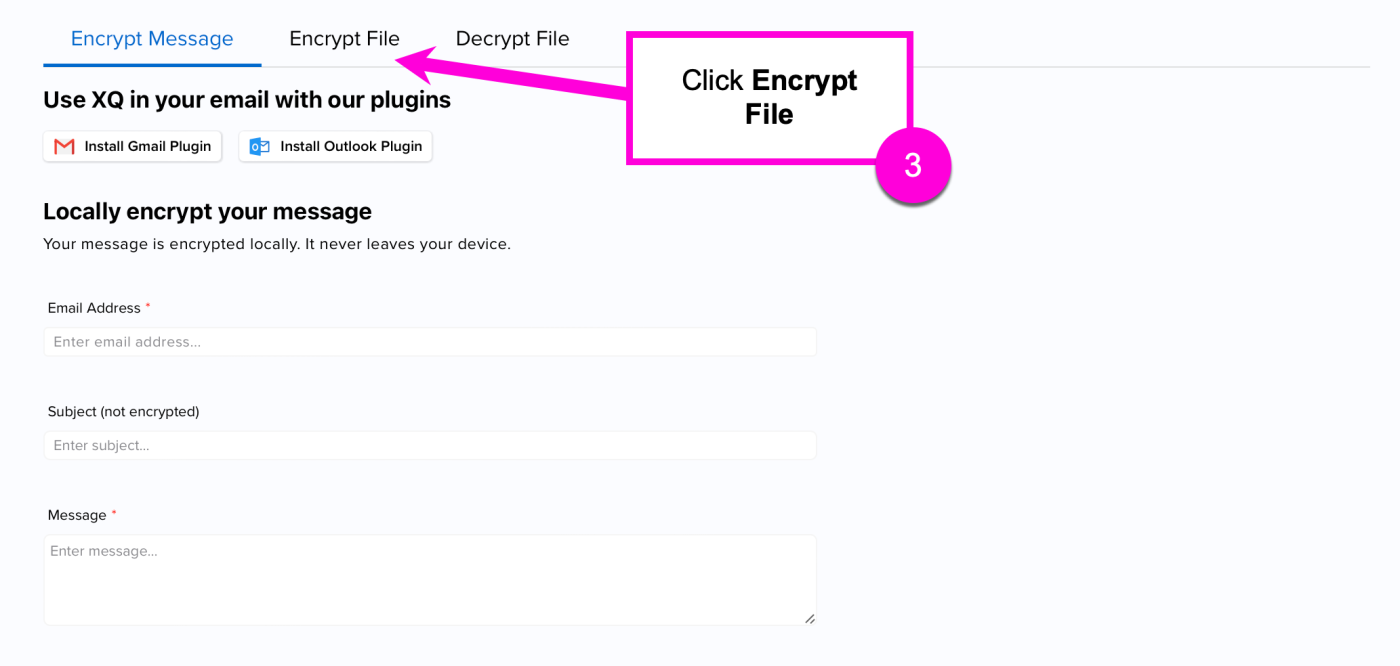
Step 3: Click Encrypt File from the top navigation menu.
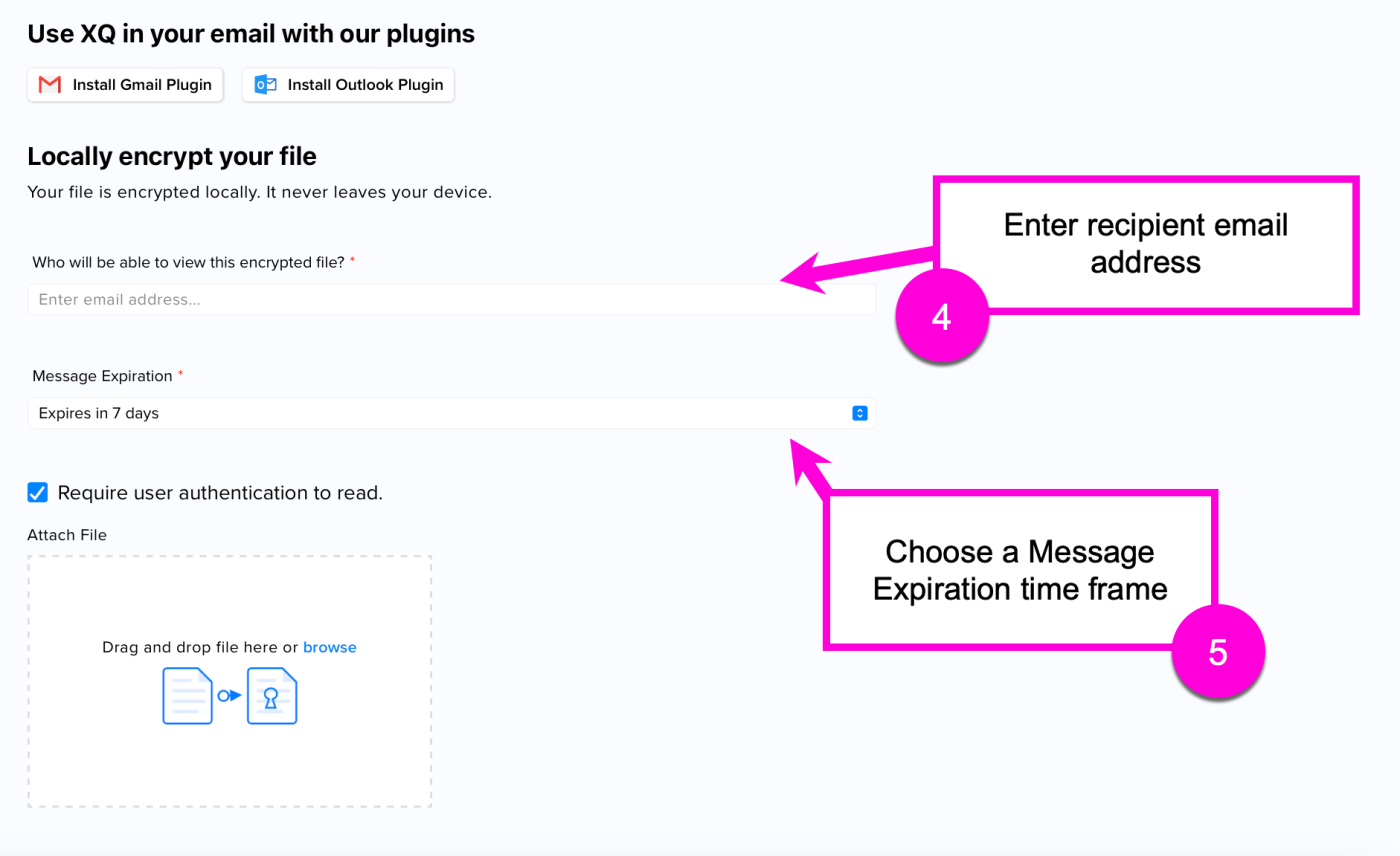
Step 4: Enter the recipient's email address(es) in the Who will be able to view this encrypted file? field.
Step 5: Select a Message Expiration time frame.
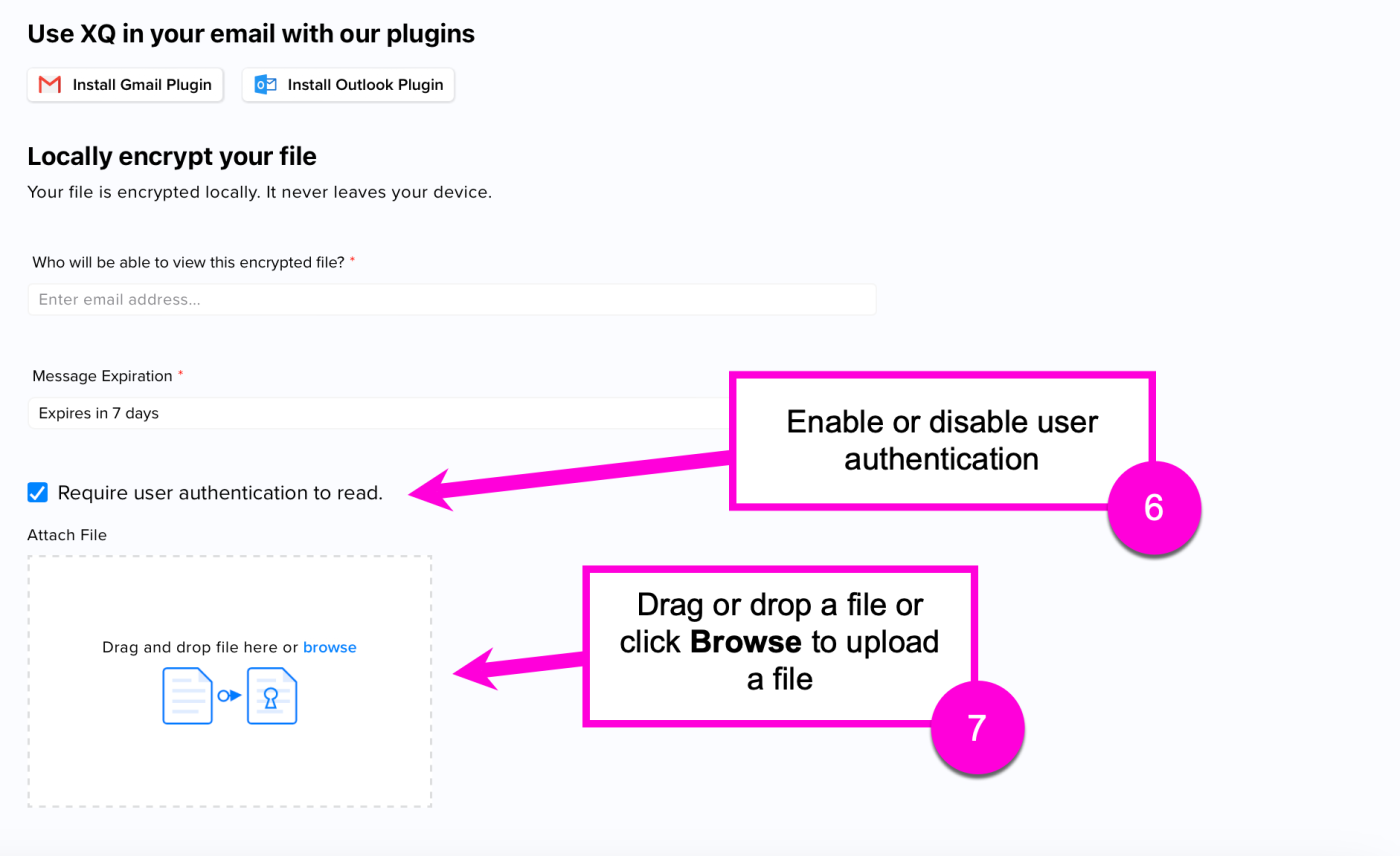
Step 6 - Optional: Use the checkbox to enable or disable Require user authentication to read.
Step 7: Drag and drop a file or click Browse to upload a file.
Step 8: Click DOWNLOAD ENCRYPTED FILE.
Your file is now encrypted and can be sent to a recipient or saved on your device locally.