How to Create a Secure Form Application for your Website
This article describes how to customize your Secure Form settings and obtain the HTML snippet needed to install the application onto your website.
For instructions on installing your embed code on Squarespace, see How to Install Secure Forms for a Squarespace Site.
Create a Secure Forms application
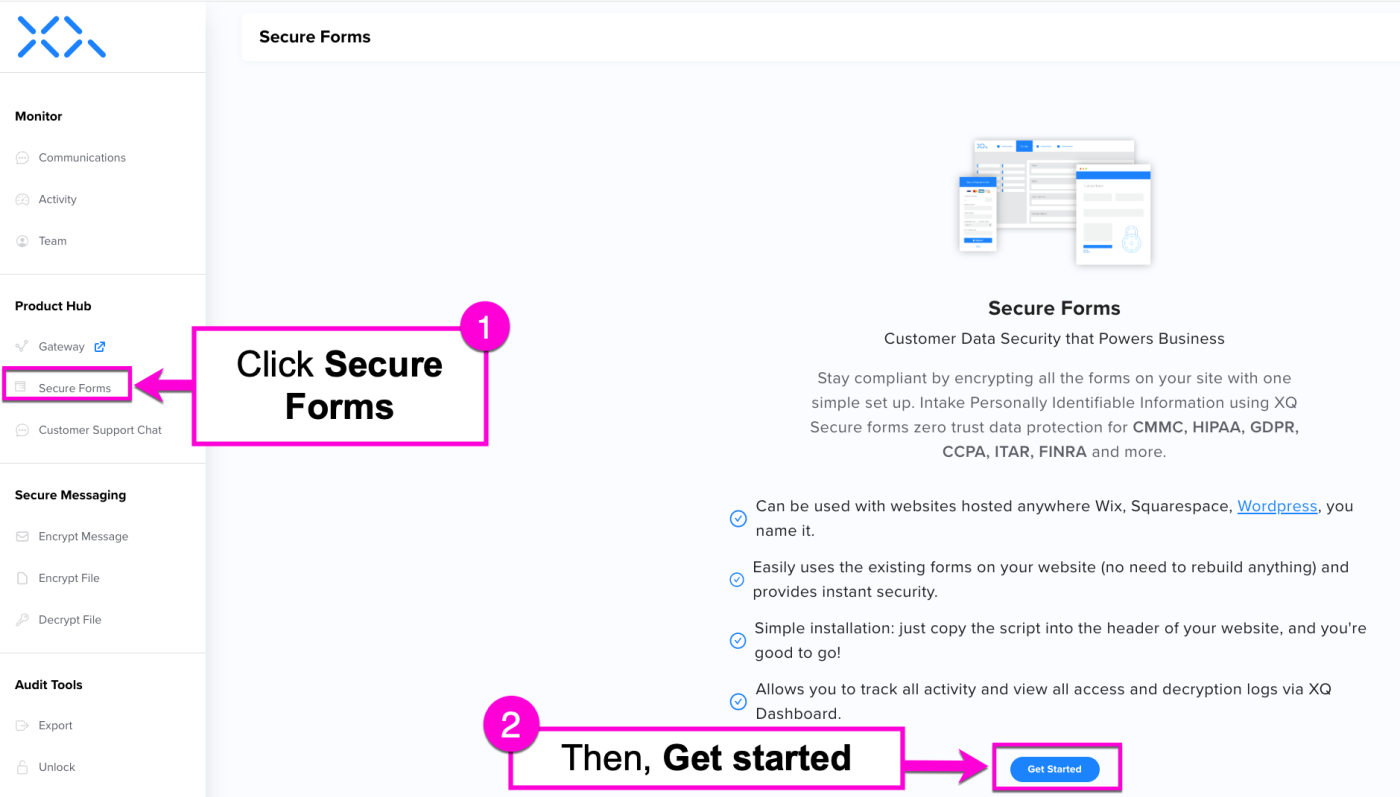
Step 1: Open the XQ Dashboard and click on Secure Forms in the left-hand navigation bar. Then, click the Get Started button.
Note: If there are already existing Forms applications in your account, click the ADD NEW bottom at the top of the page instead. Then, click Get Started.
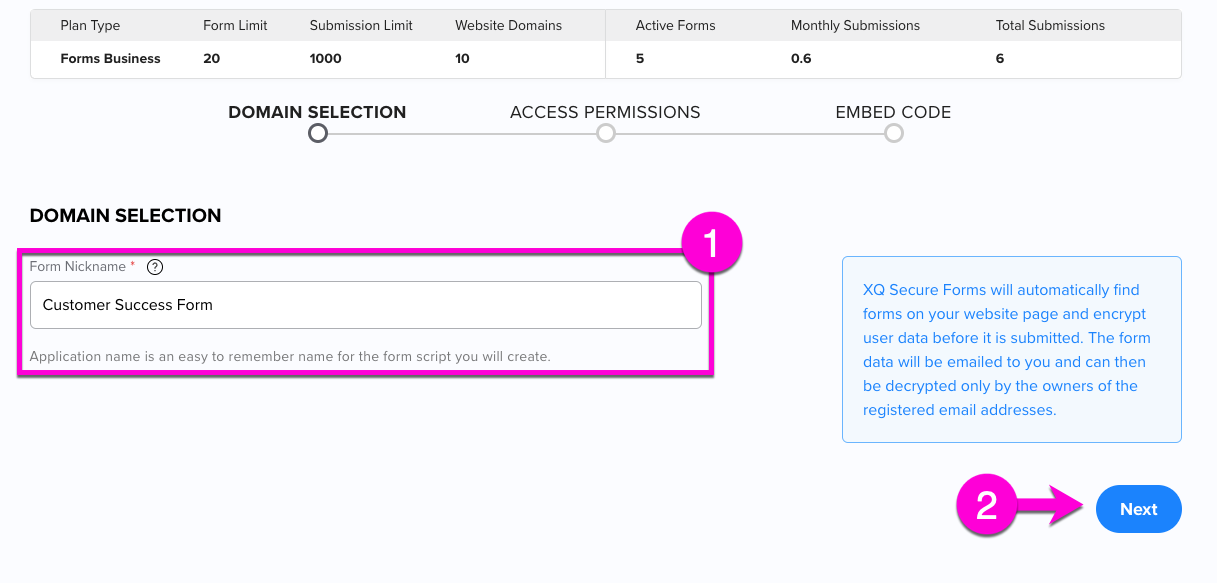
Step 2: Enter the application's nickname in the Form Nickname field. This should be a recognizable name that will help you identify it later. Then, click Next.
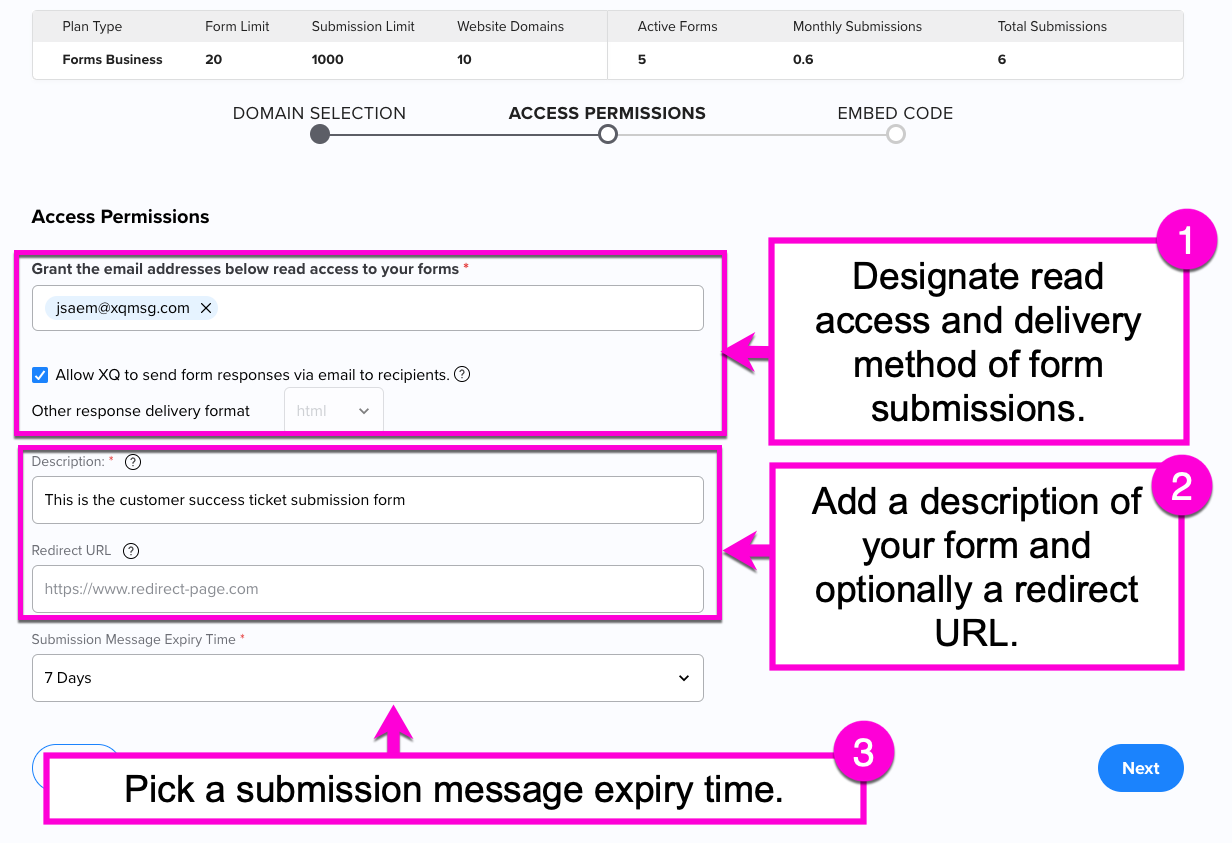
Step 3: Edit the following Access Permissions for your application:
- Email Address Access: Enter the email addresses of recipients who can read the form responses.
- Allow XQ to send form responses via email to recipients: Choose whether your recipients receive an immediate email after the form has been completed. If you turn this off, you can choose another response delivery format from the dropdown list.
- Description: A brief description to help others identify the form. This will be visible on the XQ Dashboard.
- Redirect URL: Enter the page URL you would like to redirect users to after successful form submission. This field is optional.
- Submission Message Expiry Time: From the dropdown list, choose the length of time the message can be viewed.
Click Next once complete.
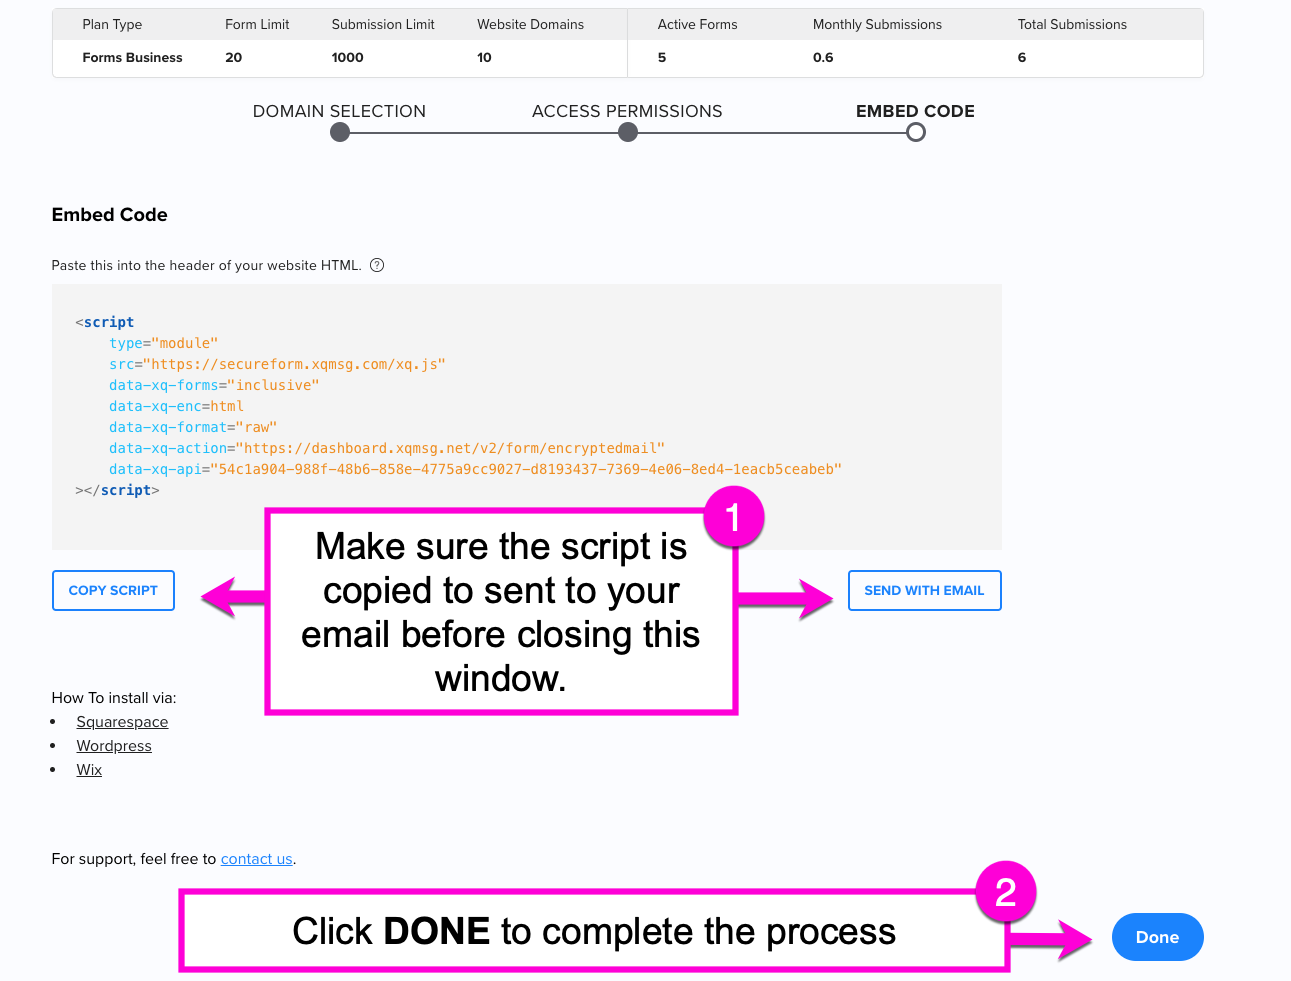
Step 4: On the Embed Code page, copy the script to your clipboard using the COPY SCRIPT button or send it to your email address with the SEND WITH EMAIL button.
Warning: You will only be able to see this script once. Ensure it is safely in your clipboard or stored elsewhere.
Click DONE to complete the process.
You can now add the HTML snippet to your website.
If you need to edit the access permissions of this form later, you can view it from the Secure Forms section of the XQ Dashboard.


