How to Assign a Seat/License to Your Account

Users with an assigned seat/license can encrypt email messages and files through XQ. These seats can be assigned to any User or Super User in your account.
Team members without an assigned seat can only decrypt messages or view certain sections in the XQ Dashboard. To learn more about team members, see How to Add Team Members.
Team owners can purchase upgrades for their XQ accounts. For more information on upgrades, see How to Upgrade.
Purchase seats for your account
Before assigning seats to users, ensure that you have a sufficient number of seats available. Refer to the following steps to check the number of seats available to your team.
Step 1: Select your team from the drop-down list at the top right of the XQ Dashboard.
Step 2: Click your username and select Account & Billing from the drop-down menu.
Step 3: On the Settings page, click Billing.
Step 4: Under the Communications Business section, you can view the existing seats available in your account. To add more, click Upgrade Plan and follow the prompts to purchase your desired amount of seats.
Add and remove seats
After adding seats, you can assign them to any team member designated as a User or Super User. Refer to the following steps to add and remove seats from your account.
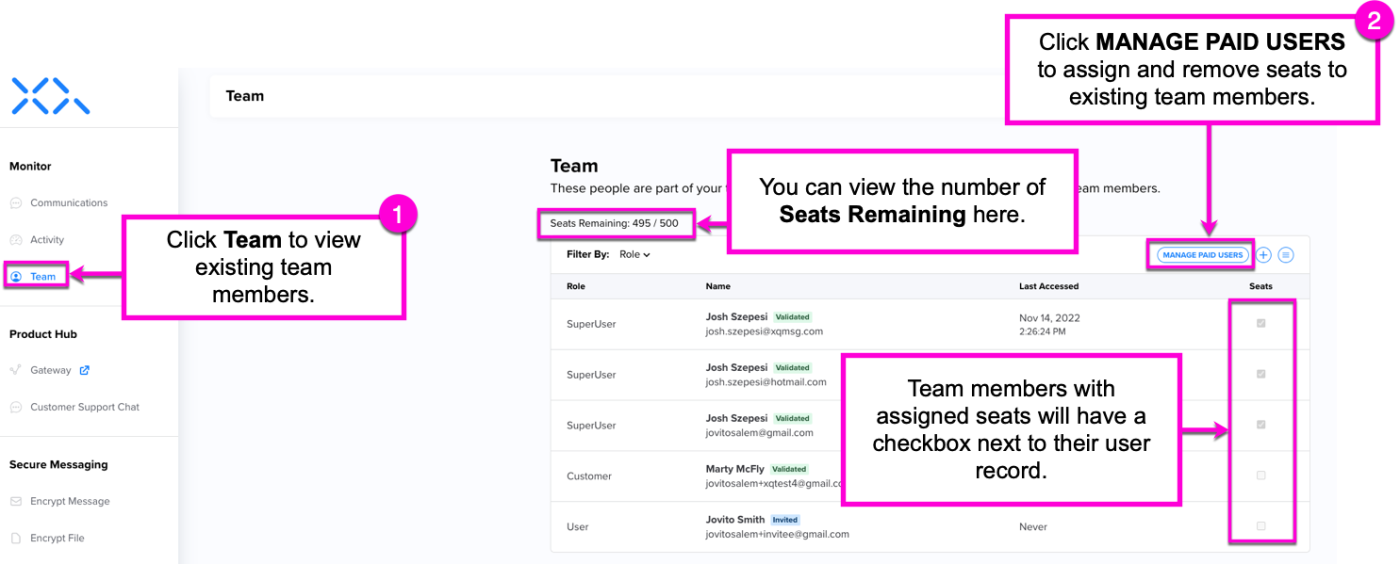
Step 1: Ensure you are on the correct Team Dashboard and click the Team tab from the Dashboard navigation menu.
You will see a list of existing team members, and a Seats Remaining status. Users with existing seats will have a greyed-out checkbox on the right-hand side of their user details.
Step 2: Click MANAGE PAID USERS on the Team page.
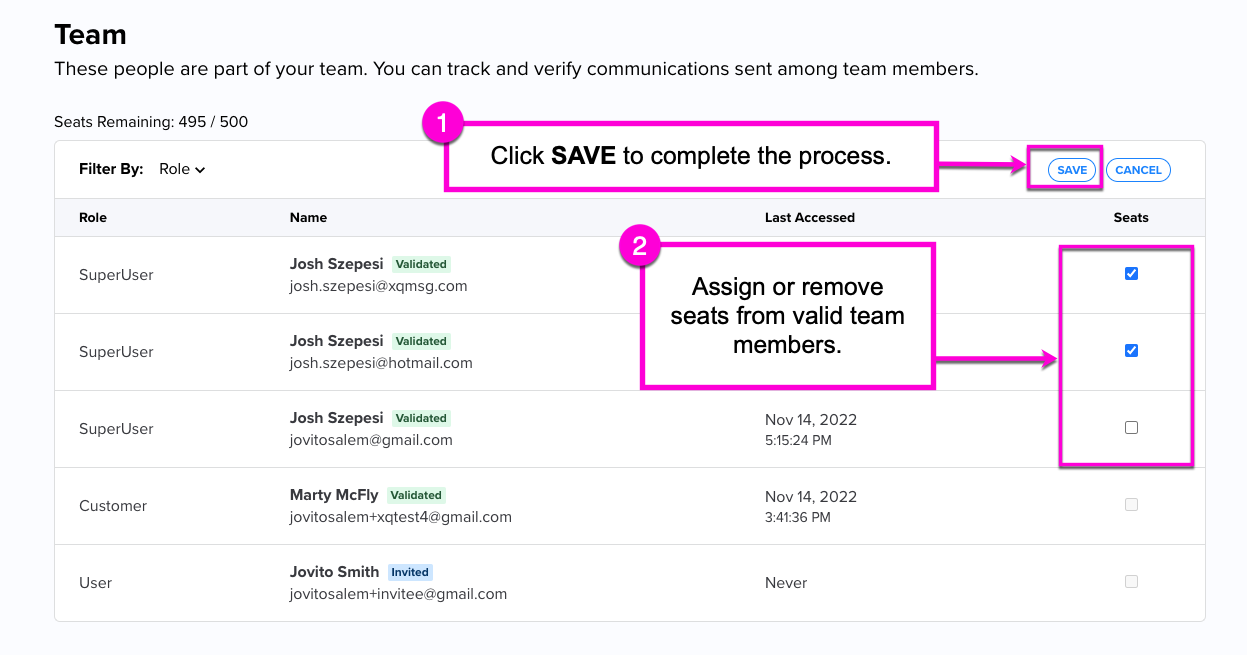
Step 3: Check or uncheck the boxes under the Seats column to add or remove licenses to specific team members. You can only add seats to Users or Super Users.
Click SAVE to complete the process.