How to Use Secure Chat
XQ Secure Chat is the world's first Zero Trust Chat platform. This article provides guidance on accessing and using Secure Chat.
Step 1: Navigate to secure.chat.
Step 2: Log in using an email address, phone number, magic link, or Google single sign-on. Alternatively, enter a screen name and click Start chat to use Secure Chat as a guest.
Step 1: Click the + icon or select Start a conversation.
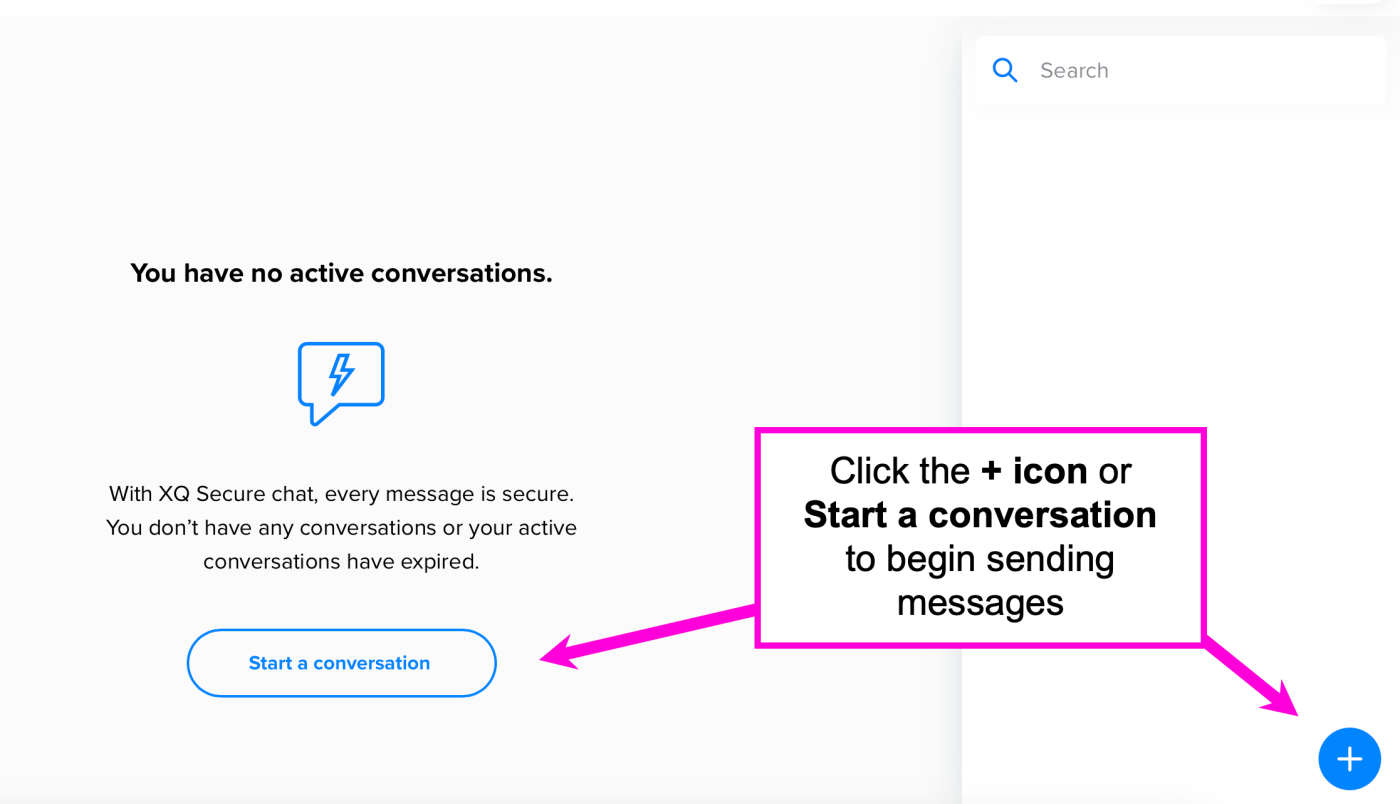
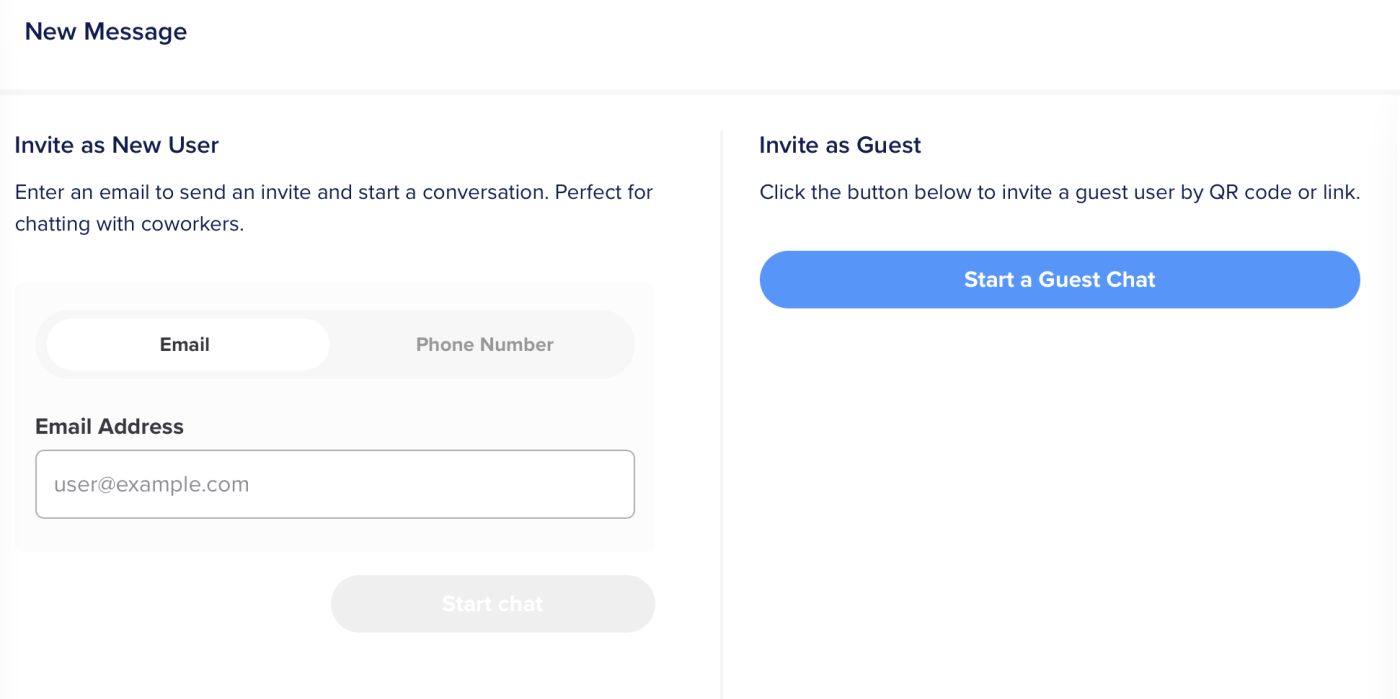
Step 2: On the New Message screen, enter the recipient's email address or phone number and click Start chat. Alternatively, click Start a Guest Chat to invite a guest user.
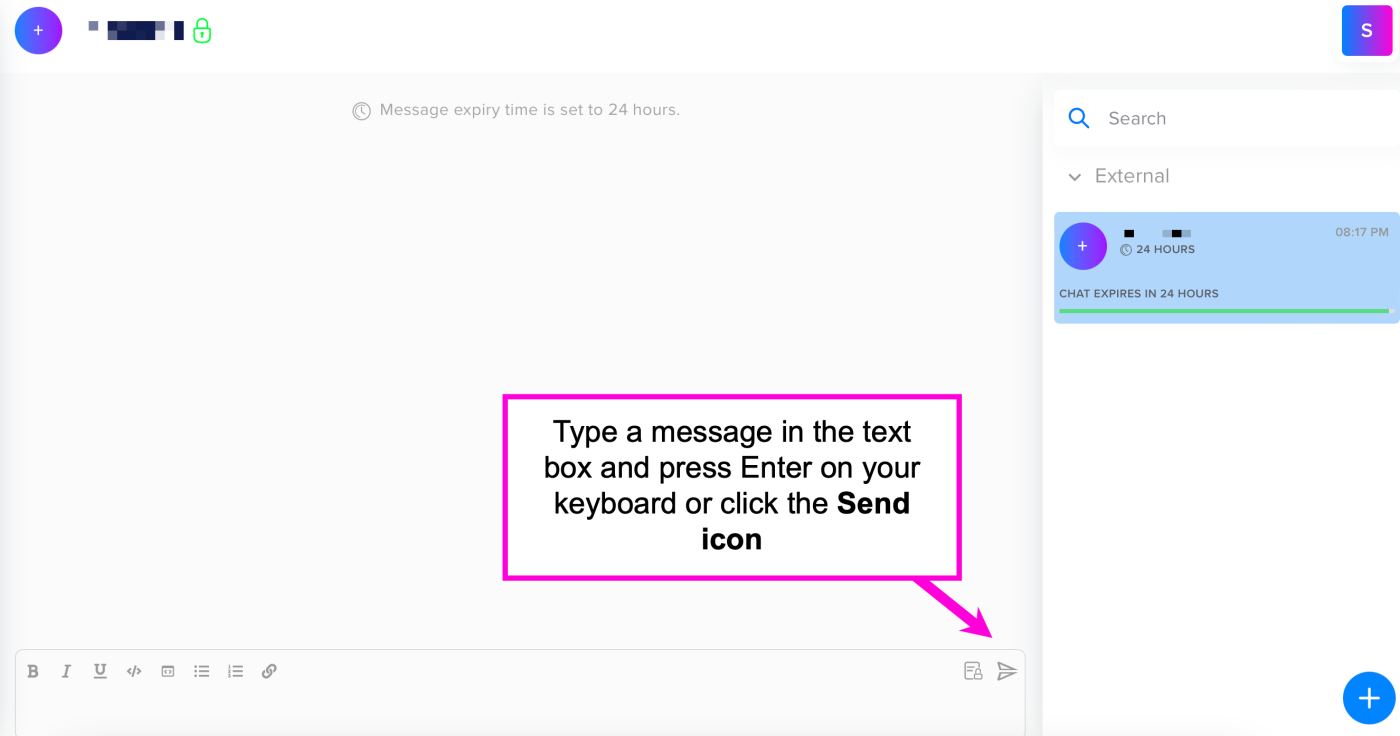
Step 3: The chat window will automatically open. By default, the chat expiration time is set to 24 hours.
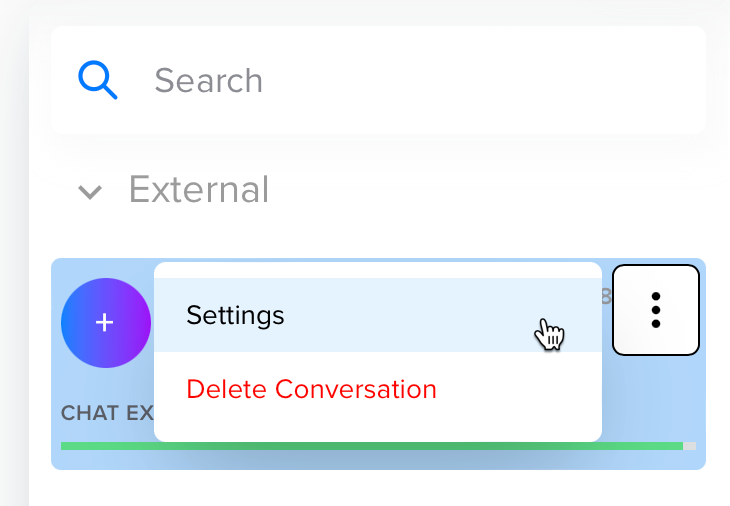
To change the expiration time, click the ellipsis and select Settings. From the Settings menu, select a new expiration time. Once selected, the expiration time will automatically change.
Step 4: To start the chat, type a message in the text box and press Enter on your keyboard or click the Send icon. Additionally, you can use the File attachment icon to send a file via Secure Chat.
The users you invited to the chat will receive an email or text message invitation to join the chat after you send the first message. Each message is encrypted with its own unique key to ensure only the intended recipient can view the message.
Step 5: When your chat is complete, click on the ellipsis and select Delete Conversation. This permanently deletes the chat conversation and the chat can never be recovered. If you do not delete the conversation, all messages will expire according to the chat's expiration settings.
You can also delete individual messages by hovering over the message, clicking on the ellipsis, and selecting Delete Message.
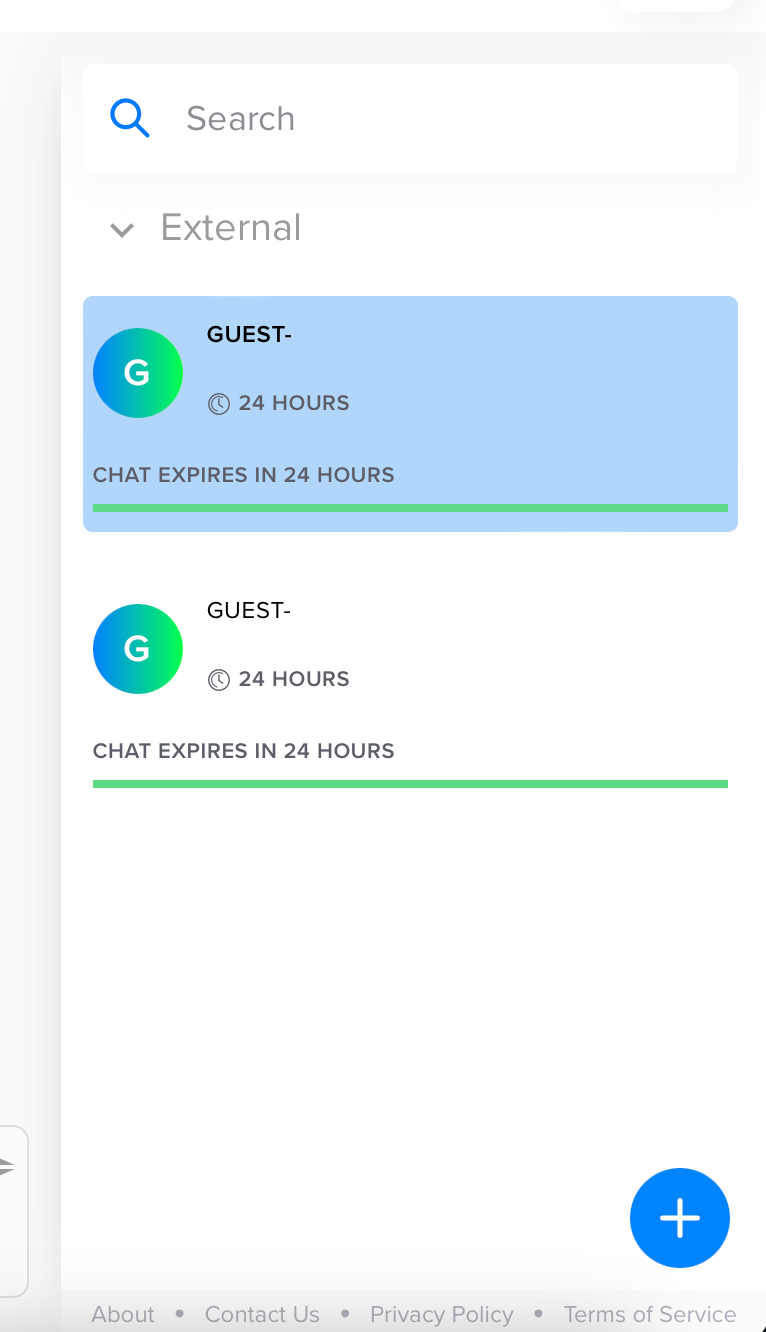
You can use the Settings or Delete Conversation options in each chat independently.
Access Secure Chat
You can access Secure Chat from a desktop or mobile browser. Refer to the following steps to access Secure Chat:Step 1: Navigate to secure.chat.
Step 2: Log in using an email address, phone number, magic link, or Google single sign-on. Alternatively, enter a screen name and click Start chat to use Secure Chat as a guest.
Sending messages
Once logged in, you can begin using Secure Chat to send messages. Refer to the following steps to send messages using Secure Chat:Step 1: Click the + icon or select Start a conversation.

Step 2: On the New Message screen, enter the recipient's email address or phone number and click Start chat. Alternatively, click Start a Guest Chat to invite a guest user.

Step 3: The chat window will automatically open. By default, the chat expiration time is set to 24 hours.
To change the expiration time, click the ellipsis and select Settings. From the Settings menu, select a new expiration time. Once selected, the expiration time will automatically change.

Step 4: To start the chat, type a message in the text box and press Enter on your keyboard or click the Send icon. Additionally, you can use the File attachment icon to send a file via Secure Chat.
The users you invited to the chat will receive an email or text message invitation to join the chat after you send the first message. Each message is encrypted with its own unique key to ensure only the intended recipient can view the message.

Step 5: When your chat is complete, click on the ellipsis and select Delete Conversation. This permanently deletes the chat conversation and the chat can never be recovered. If you do not delete the conversation, all messages will expire according to the chat's expiration settings.
You can also delete individual messages by hovering over the message, clicking on the ellipsis, and selecting Delete Message.
Managing multiple chats
You can start and use multiple different chat sessions at one time. To start additional chat sessions, click the + icon and invite a new user. The new chat will appear in the right-hand chat management menu and you can switch chats by clicking on the desired chat from the list.
You can use the Settings or Delete Conversation options in each chat independently.
Tagged:


