

How to Upgrade

Team owners can purchase plans to upgrade their XQ accounts and add additional XQ products to their team's Dashboard. This article provides steps for upgrading your XQ account.
Step 1: Select your team from the drop-down list at the top right of the XQ Dashboard.
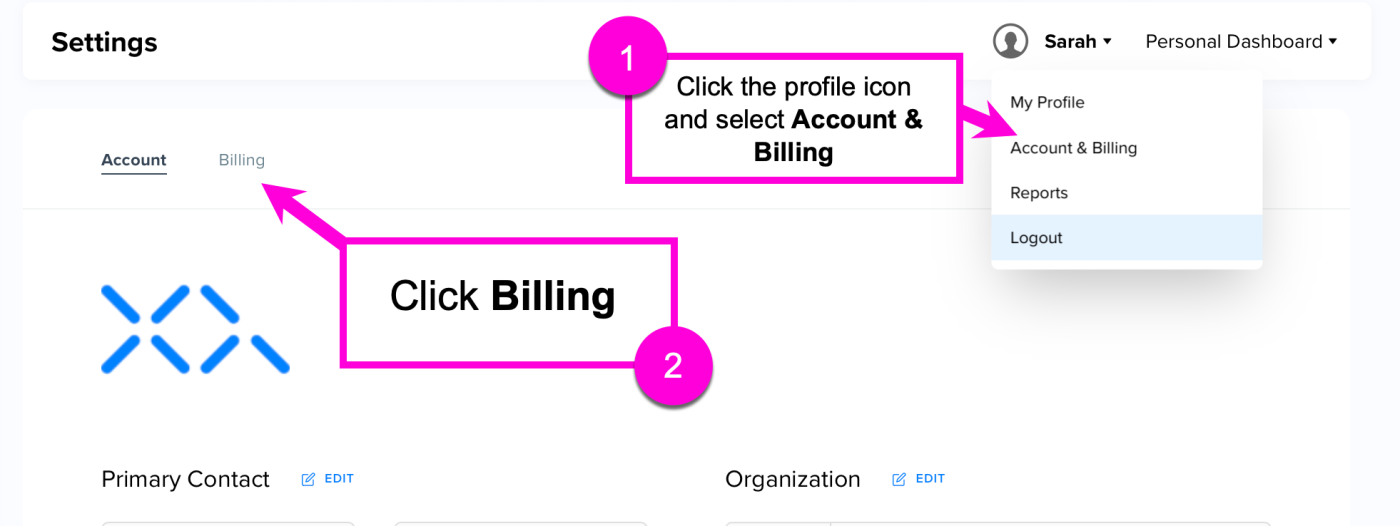
Step 2: Click your username and select Account & Billing from the drop-down menu.
Step 3: On the Settings page, click Billing.
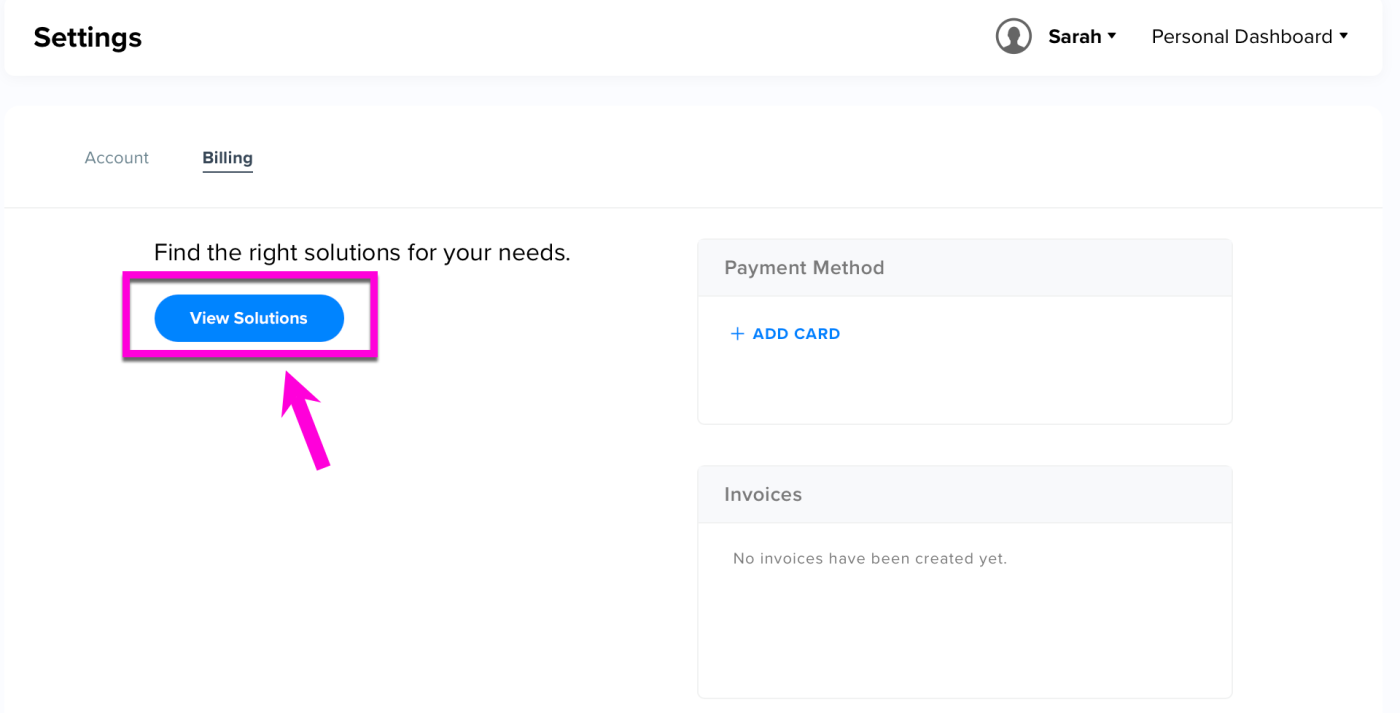
Step 4: Click View Solutions to view upgrade options.
Step 5: From the XQ pricing page, review the available solutions and click Talk To An Expert or Chat With Us if you wish to speak to the Sales team.
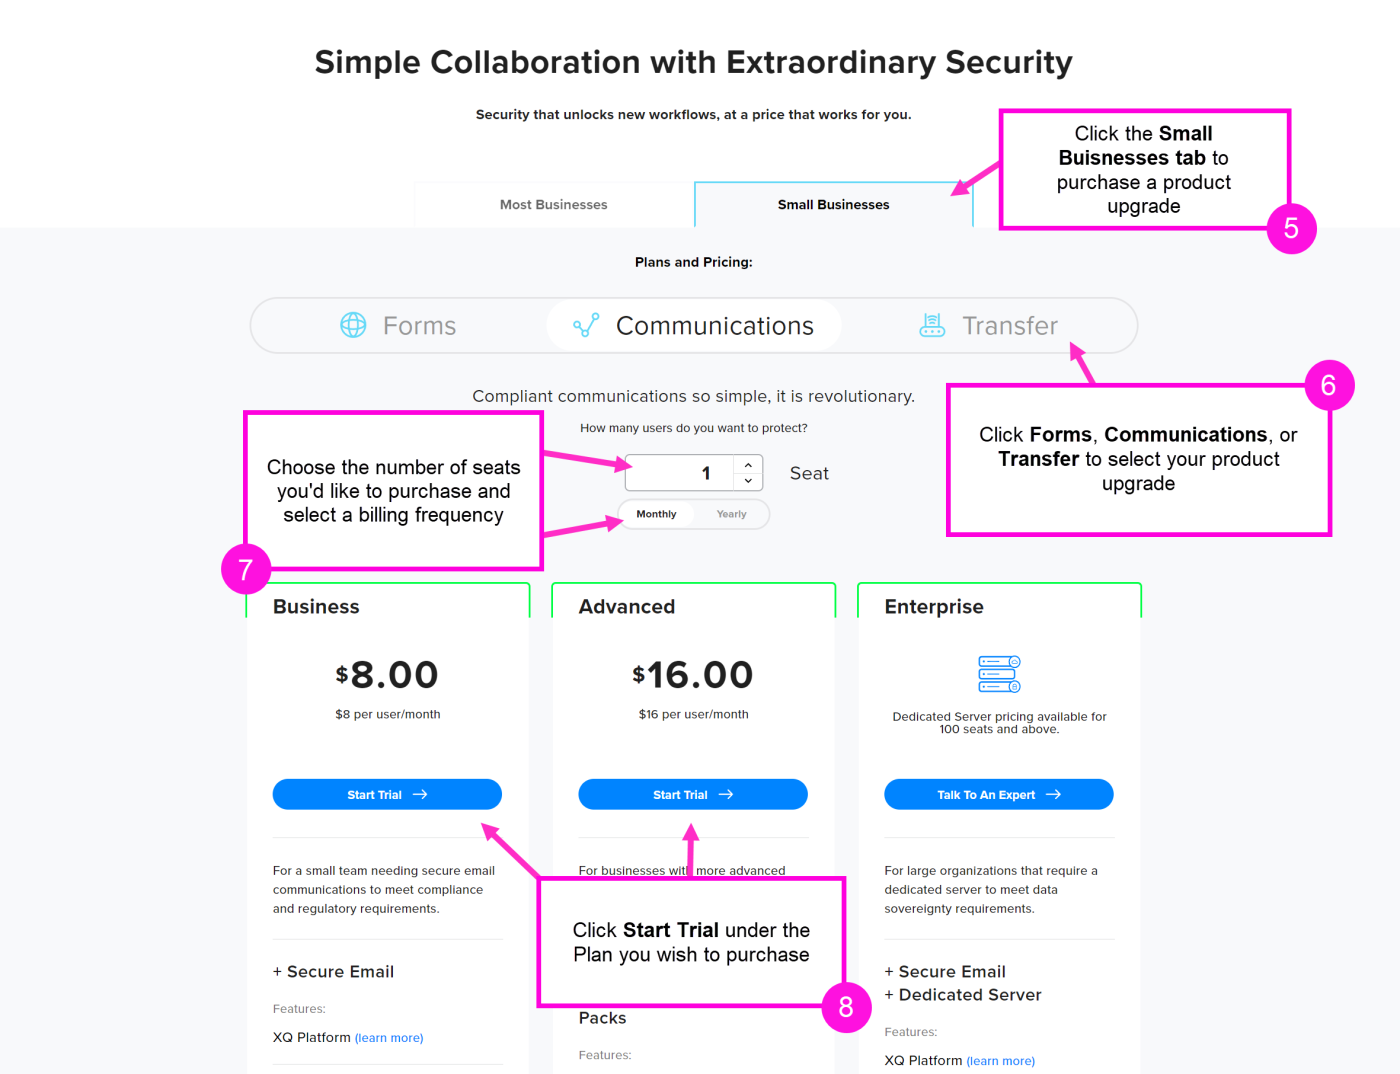
If you do not wish to speak to the Sales team, click the Small Businesses tab at the top of the screen to purchase an upgrade product.
Step 6: Use the Product tabs to select your upgrade.
Step 7: Choose the number of seats you'd like to purchase and select a billing frequency. The available billing frequencies are Monthly and Yearly.
Step 8: Click under the Plan you wish to purchase. If you are purchasing an Enterprise plan, click Talk To An Expert to connect with a member of the Sales team.
Step 9: Fill out all of the required fields on the Your Information page and click CONTINUE TO PAYMENT.
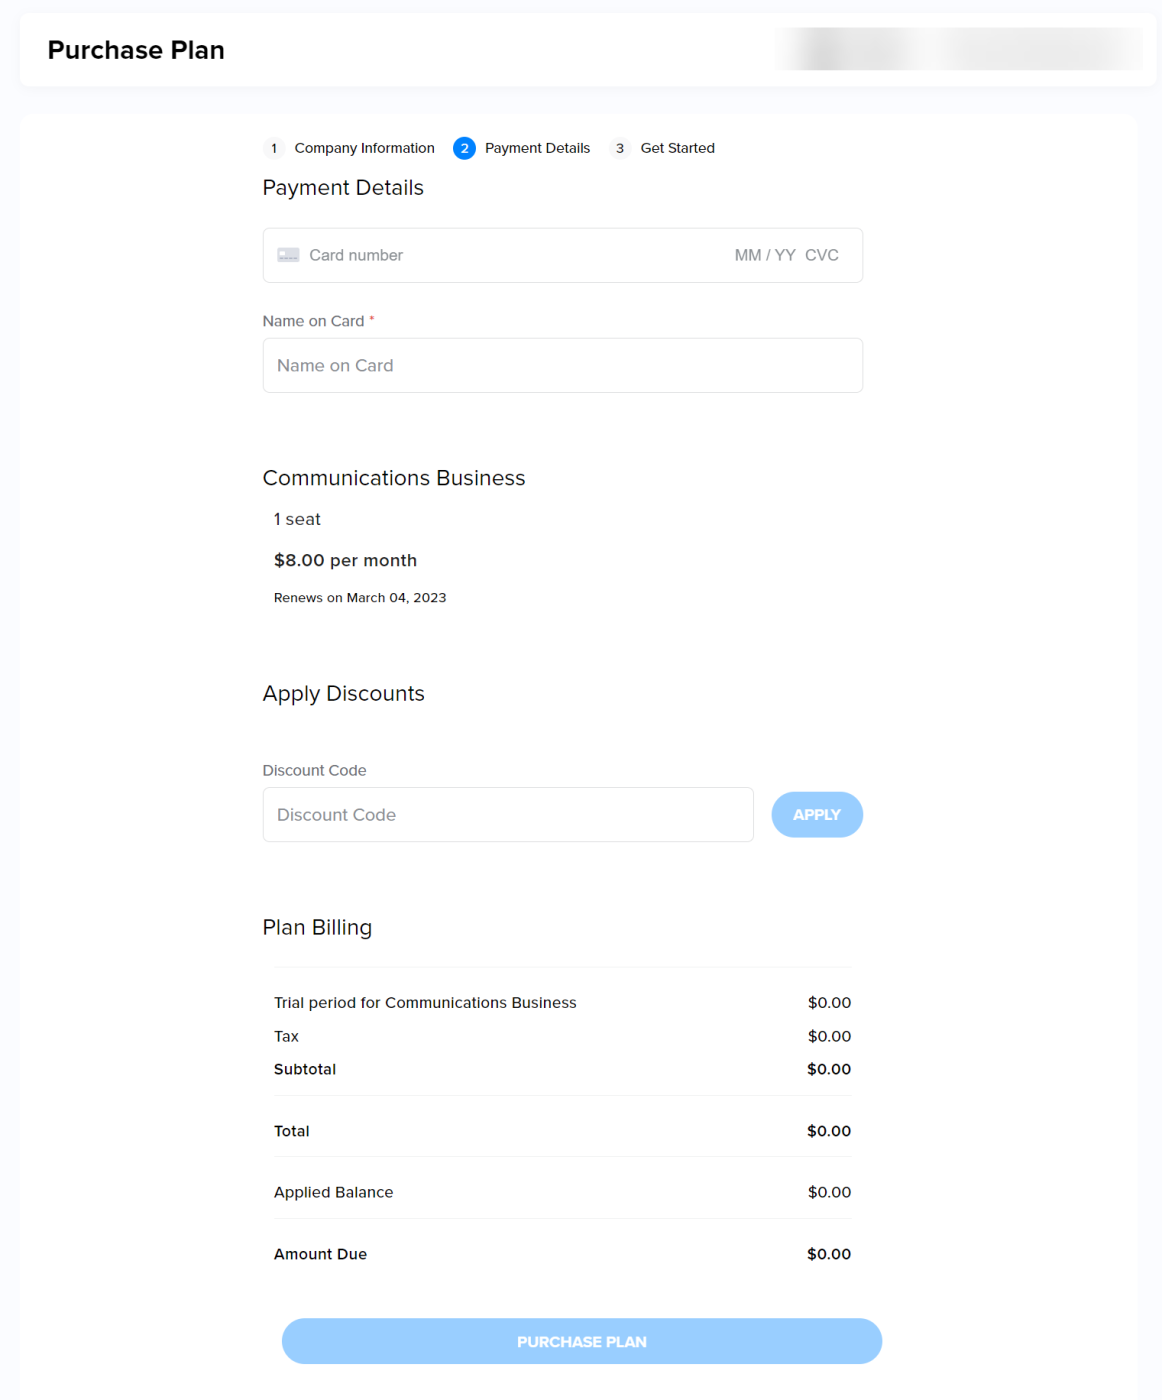
Step 10: On the Payment Details page, provide your payment information and confirm your upgrade details. Click PURCHASE PLAN when you are finished.
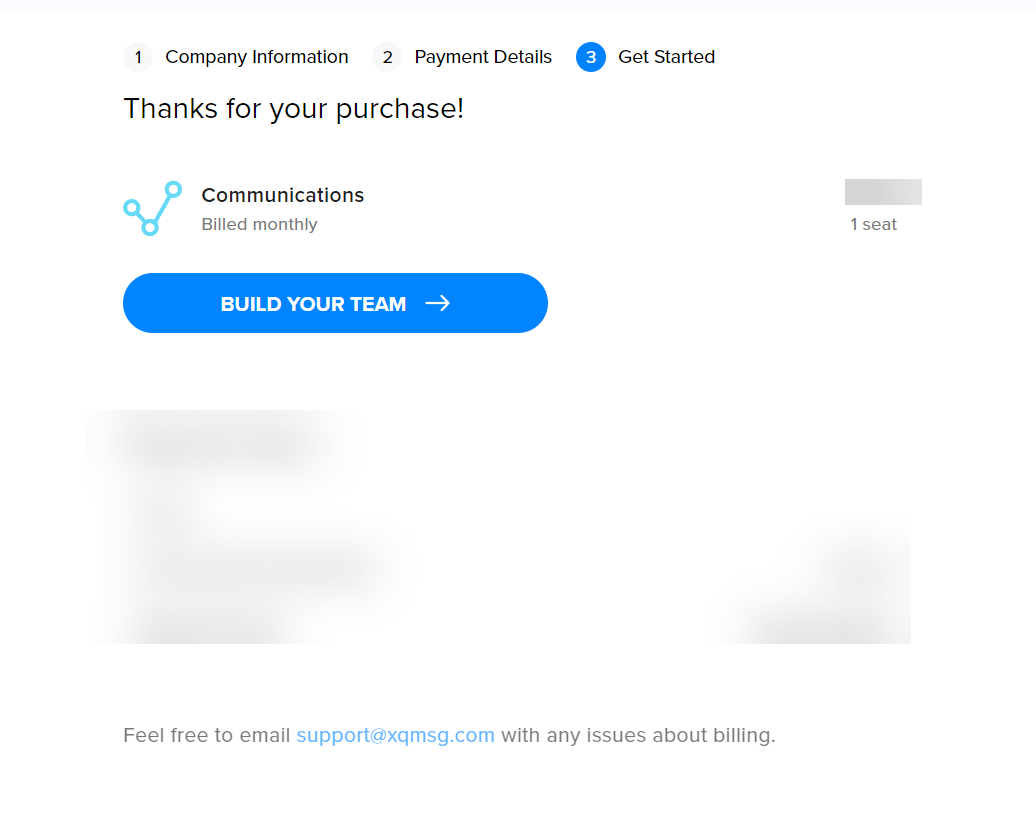
Step 11: Click BUILD YOUR TEAM to navigate back to the XQ Dashboard and begin to add team members.
Step 1: Select your team from the drop-down list at the top right of the XQ Dashboard.
Step 2: Click your username and select Account & Billing from the drop-down menu.
Step 3: On the Settings page, click Billing.
Step 4: Click View Solutions to view upgrade options.
Note: The View Solutions option is not available unless you have the SuperUser (Owner) role. Only account Owners can purchase upgrades. For more information on team member roles, see Team Member Roles and Privileges
Step 5: From the XQ pricing page, review the available solutions and click Talk To An Expert or Chat With Us if you wish to speak to the Sales team.
If you do not wish to speak to the Sales team, click the Small Businesses tab at the top of the screen to purchase an upgrade product.
Step 6: Use the Product tabs to select your upgrade.
Step 7: Choose the number of seats you'd like to purchase and select a billing frequency. The available billing frequencies are Monthly and Yearly.
Step 8: Click under the Plan you wish to purchase. If you are purchasing an Enterprise plan, click Talk To An Expert to connect with a member of the Sales team.
Step 9: Fill out all of the required fields on the Your Information page and click CONTINUE TO PAYMENT.
Step 10: On the Payment Details page, provide your payment information and confirm your upgrade details. Click PURCHASE PLAN when you are finished.
Note: If you are purchasing a trial, the total price will be $0.00. See the Renews at date on this page to confirm when you will be charged the full price for your plan.
Step 11: Click BUILD YOUR TEAM to navigate back to the XQ Dashboard and begin to add team members.