

How to Install the XQ Secure Outlook Add-In

XQ can be installed in your Outlook email account to encrypt email messages. For more information on the Secure Email product, see the XQ Product page. This article provides instructions for installing the Outlook add-in and steps to connect your XQ credentials.
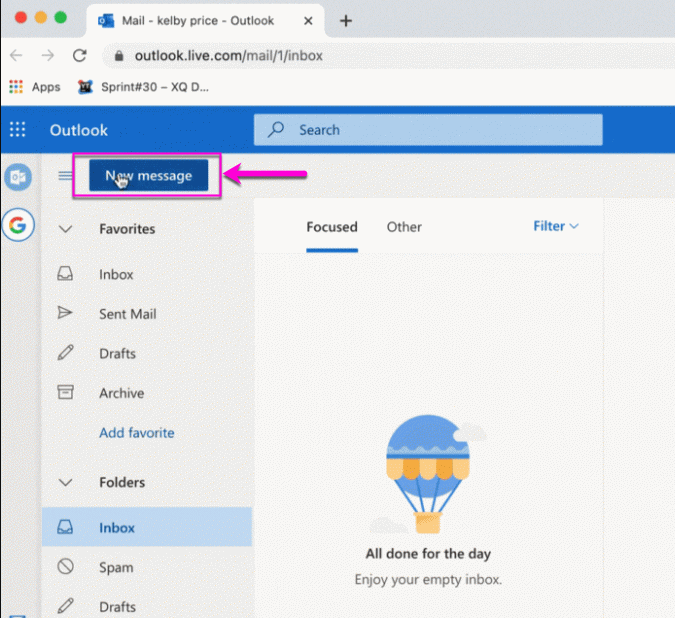
Step 1: Log into your Outlook account and create a new message.
Step 2: Click the Get Add-ins icon in the menu bar. Depending on your settings, the menu bar may be above or below the composition window.
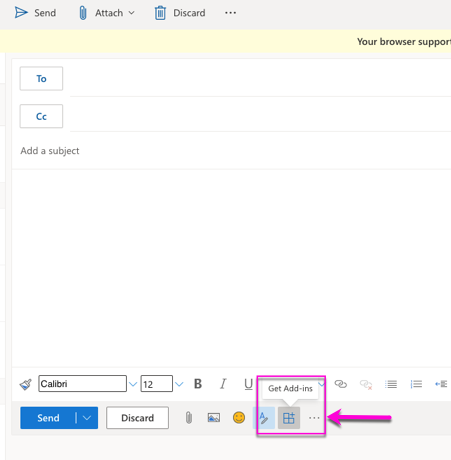
Note: If you do not see the Get Add-Ins icon, follow Microsoft's add-in guide. You may need to consult with your IT team to enable this.
Step 3: Install the add-in using one of the following methods:
Recommended - Install using a manifest link:
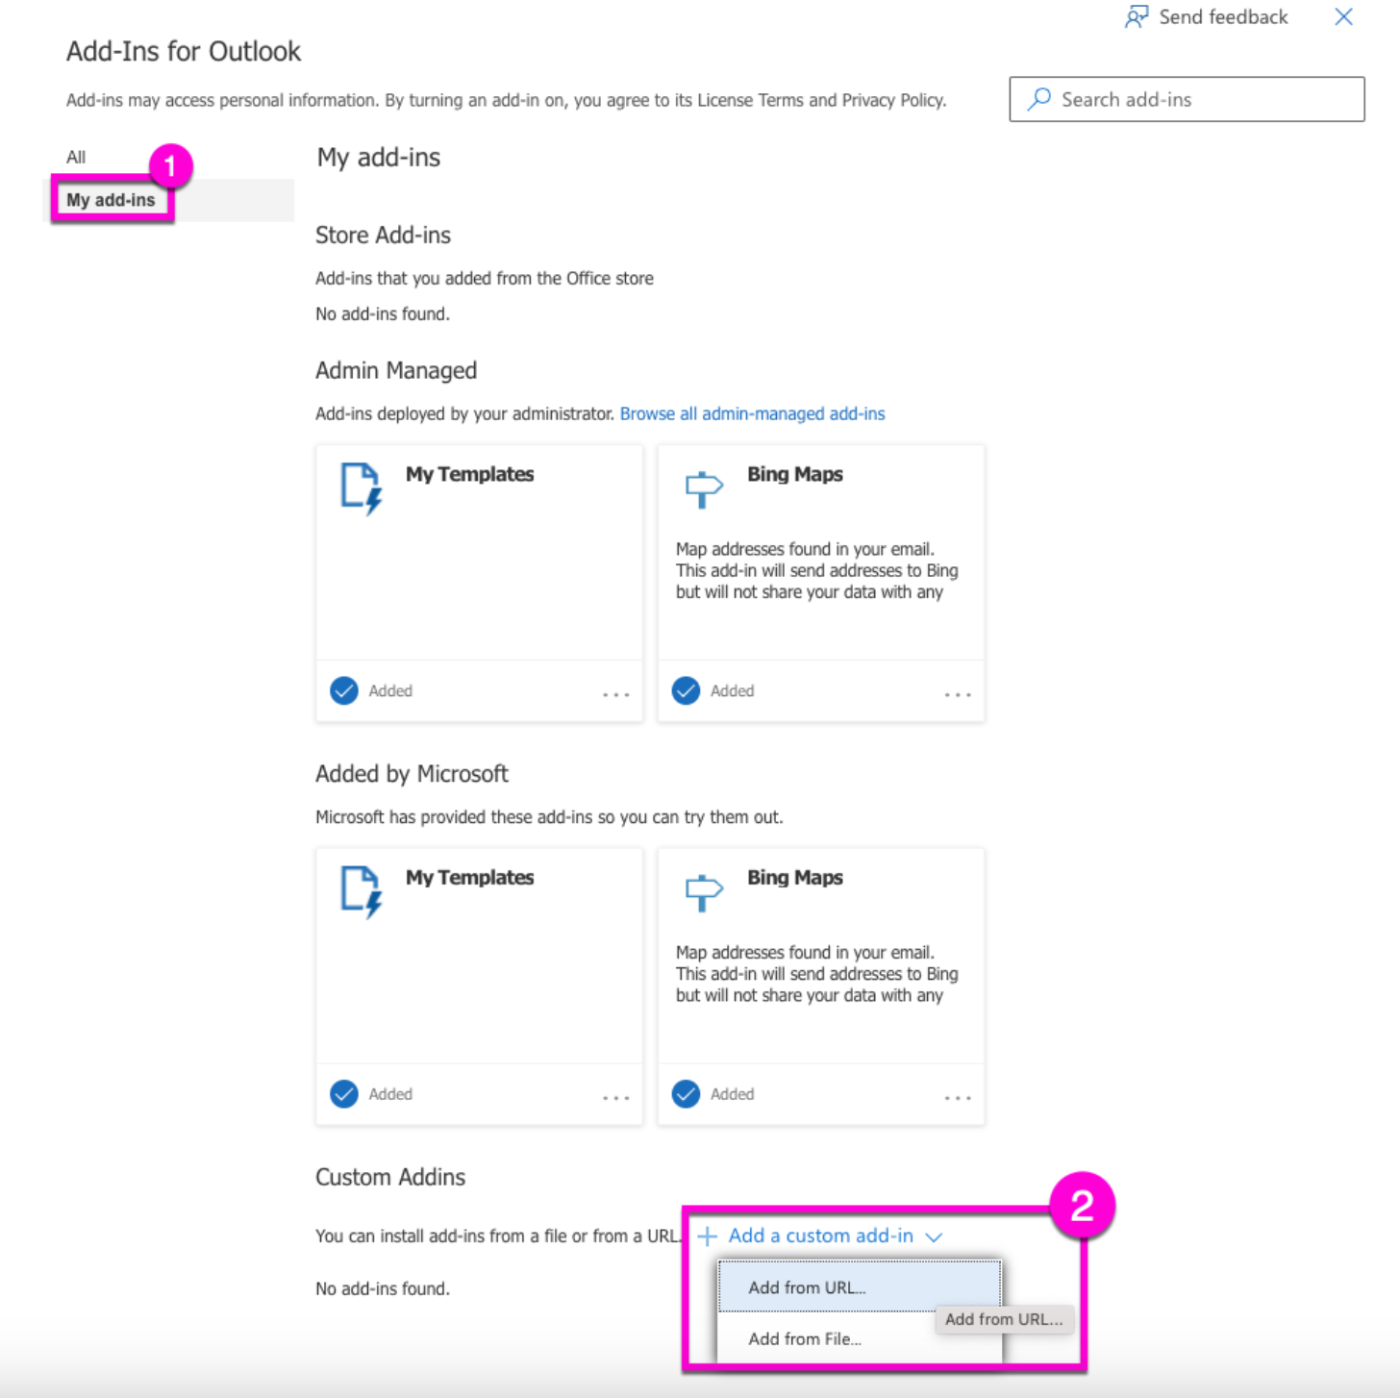
- Click My add-ins in the Add-ins browser window.
- Click Add a custom add-in under Custom Addins and select Add from URL.
- Enter the following link: https://outlook.xqmsg.com/v7/manifest-admin.xml and click Install to complete the installation process.
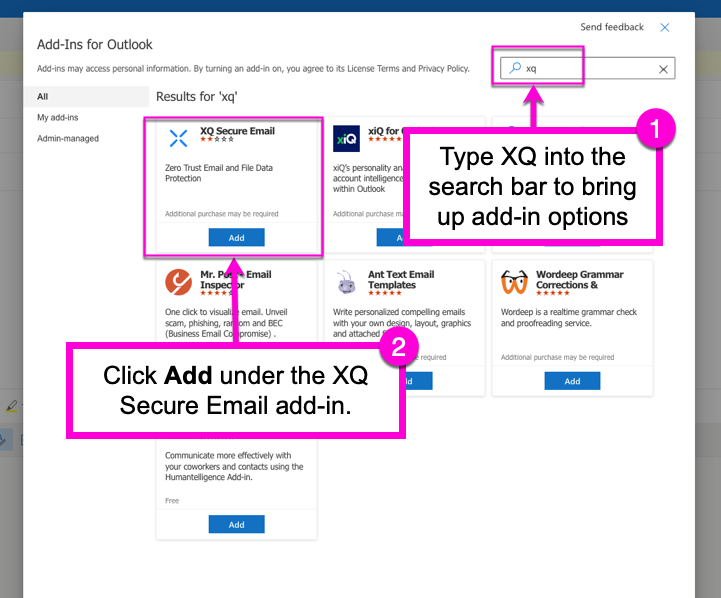
Search for XQ in the add-in library
- Type XQ in the add-ins search bar.
- Click Add under XQ's add-in listing. Agree to the terms and services to complete the installation process.
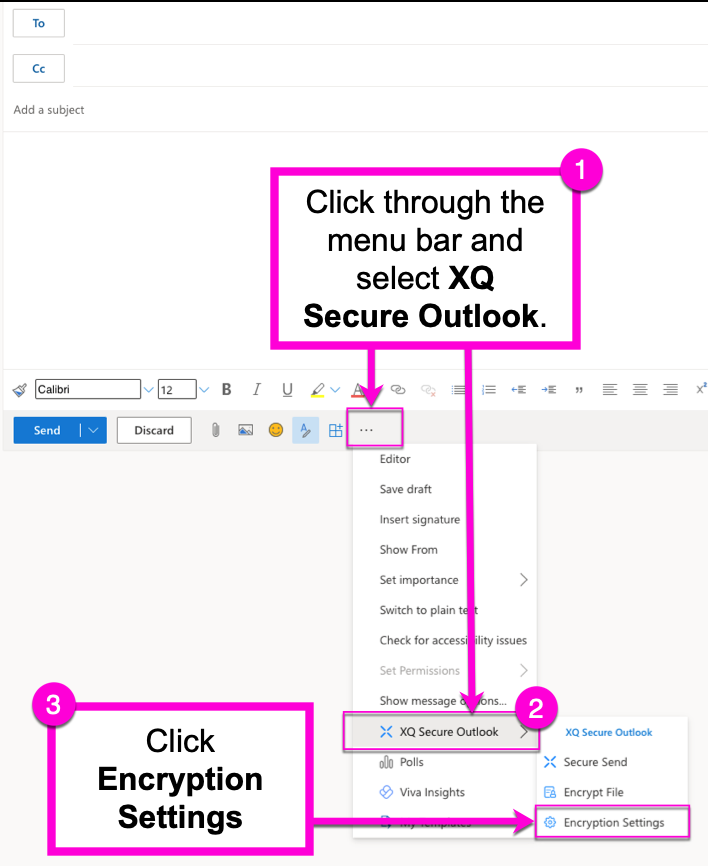
Step 4: After installing the XQ add-in, verify the XQ Secure Outlook option is available in the messaging menu bar. Click XQ Secure Outlook to launch the add-in settings. For first-time users, click Encryption Settings.
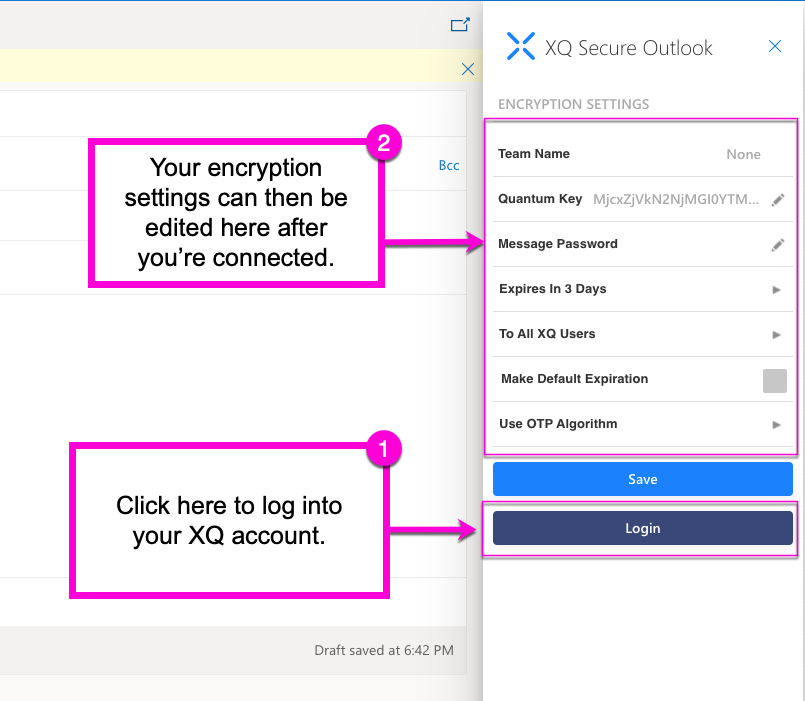
Step 5: The XQ Secure Outlook add-in will open to the right of your Outlook window. Click through the XQ tutorial until you reach the Encryption Settings window. Click Login at the bottom of the window to connect the add-in to your XQ account.
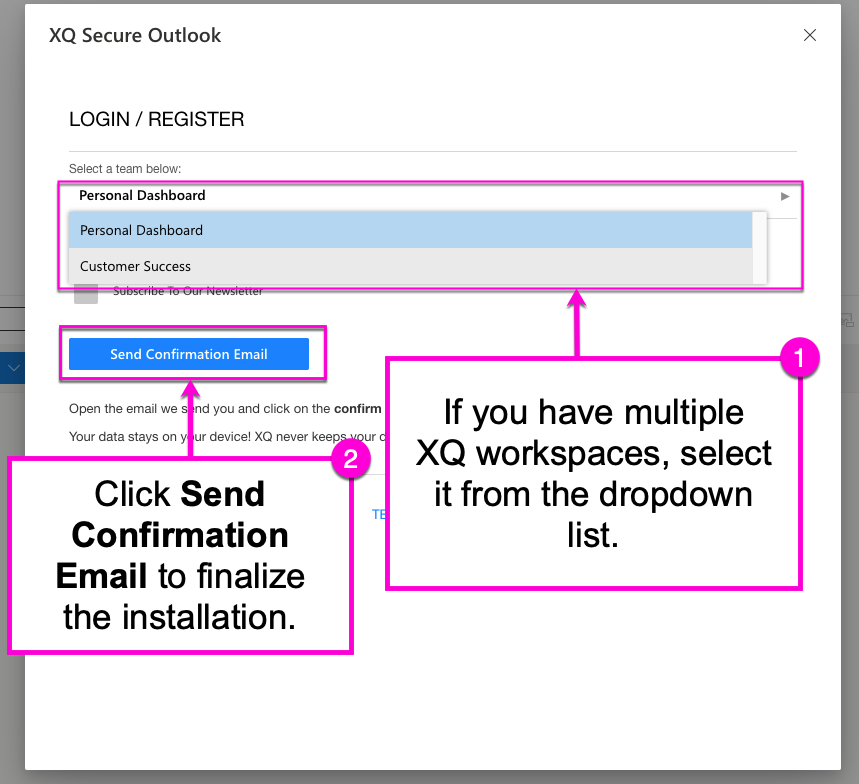
Step 7: A new Login window will appear. If you have multiple workspaces or teams in your XQ account, click on the displayed team name to open the dropdown list.
Otherwise, click the Send Confirmation Email button and close the window. You will receive a confirmation email with steps to finalize the Secure Outlook installation.
Note: Check your spam or junk mail if you do not see the XQ confirmation email in your inbox.
You are now ready to send encrypted messages and files using Outlook.