

How to Sign-in to Your Workspace in the Chrome Extension

If your XQ user credentials are associated with more than one workspace, you can choose which of those workspaces to associate your messages with. When using the Chrome Extension, this should be selected immediately after logging in to ensure that your messages are being tracked properly.
For instructions on installing the Chrome Extension, see How to Install the Chrome Extension. Once installed, refer to the following steps to choose your workspace.
Step 1: Open the XQ Message menu in the bottom-left corner of your Gmail inbox. Then, click Login.

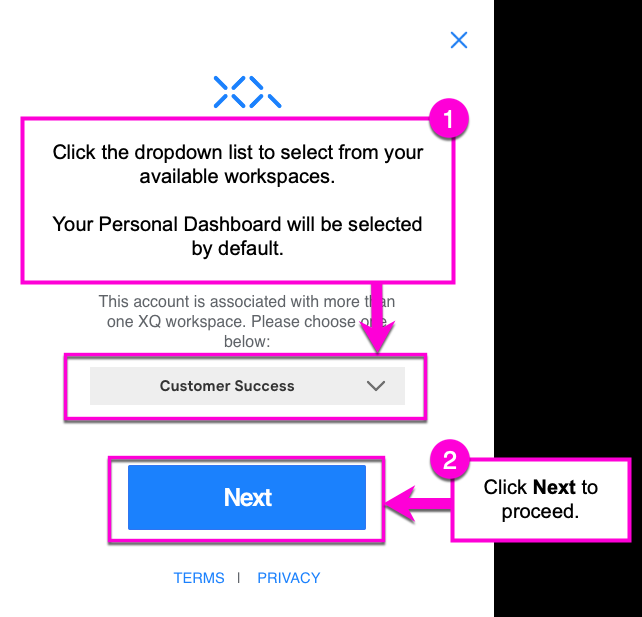
Step 2: Click on the drop-down list to select from your available workspaces. Your Personal Dashboard will be selected by default. If you do not see a drop-down option, then no other workspaces have been set up with your email address.
Click Next to proceed.
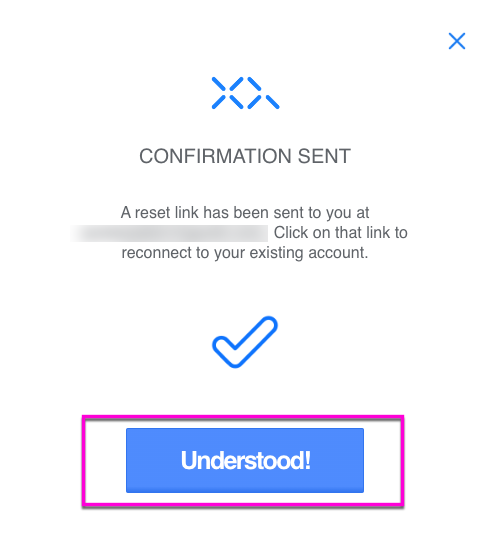
Step 3: Follow the prompts to the CONFIRMATION SENT window. At this point a link will be emailed to you. Click Understood! to close the window.
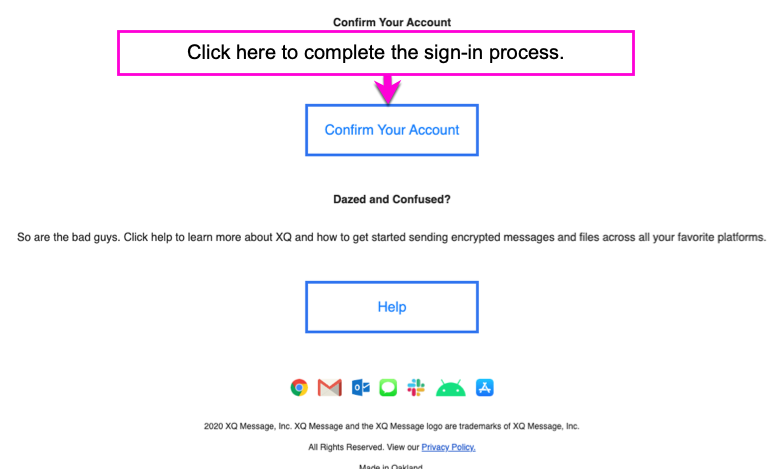
Step 4: From your email inbox, open the confirmation email from XQ. Click the Confirm Your Account button to complete the process.
You are now able to encrypt and decrypt messages directly from the Chrome Extension.