

Microsoft 365 Group - Installation

XQ can be installed in your Microsoft 365 Group to allow for seamless integration into your team's Outlook email accounts. The Outlook Add-in can be installed using a manifest link or the Add-in library.
Install with a manifest link
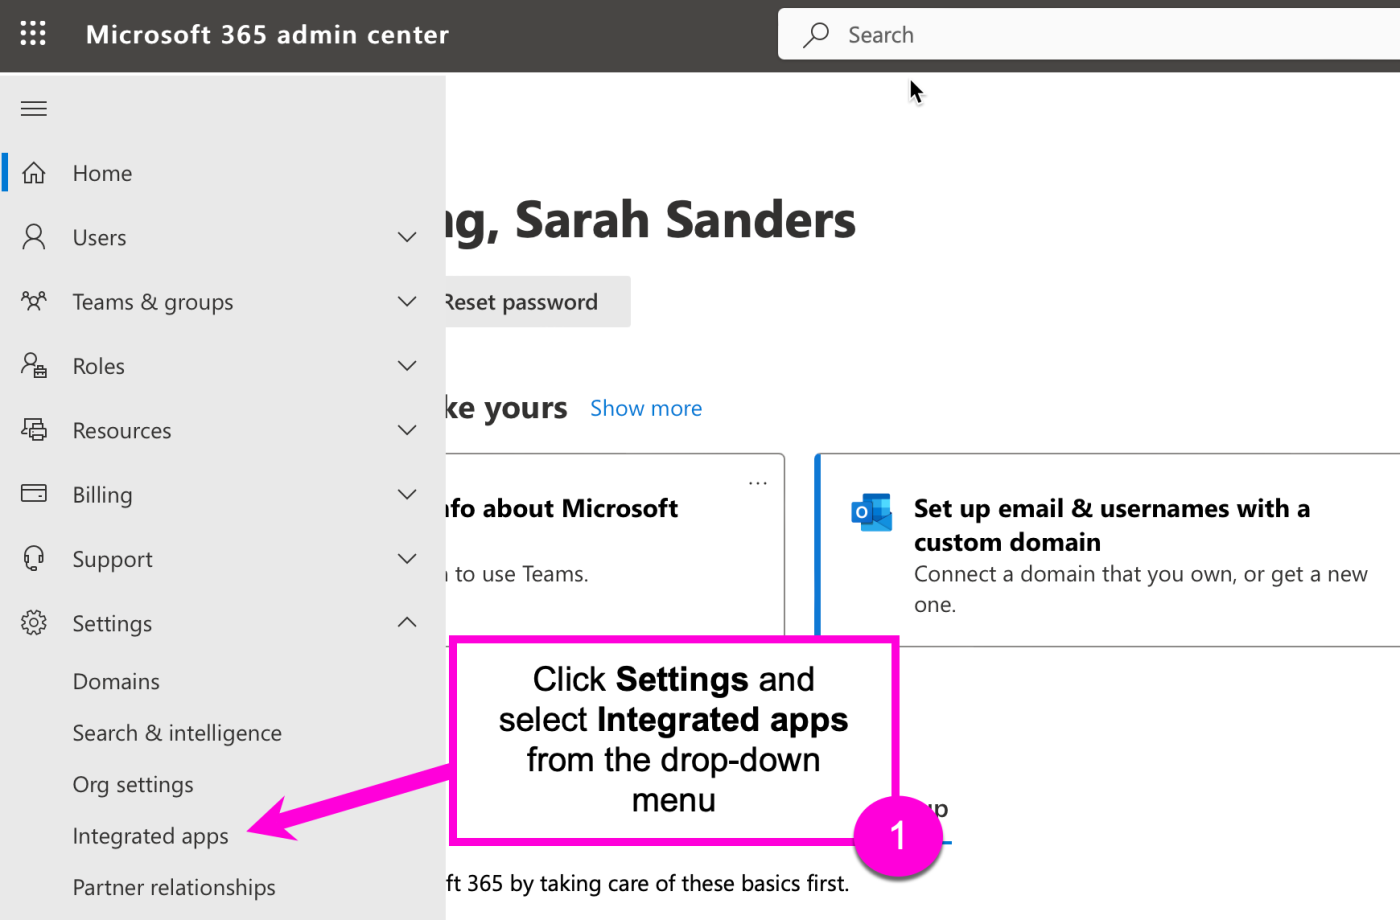
Step 1: Sign in to the Microsoft 365 admin. Open the sidebar navigation menu, click Settings and select Integrated apps.
Step 2: From the Integrated apps page, click Add-ins.

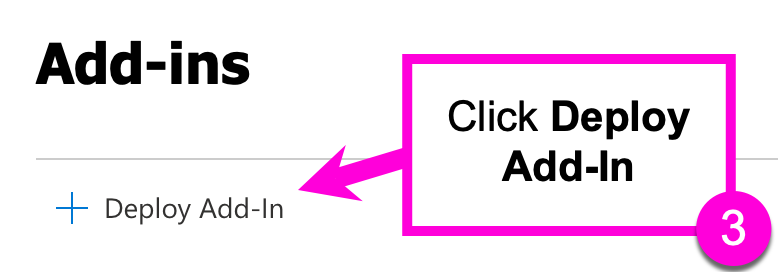
Step 3: From the Add-ins page, click Deploy Add-In.
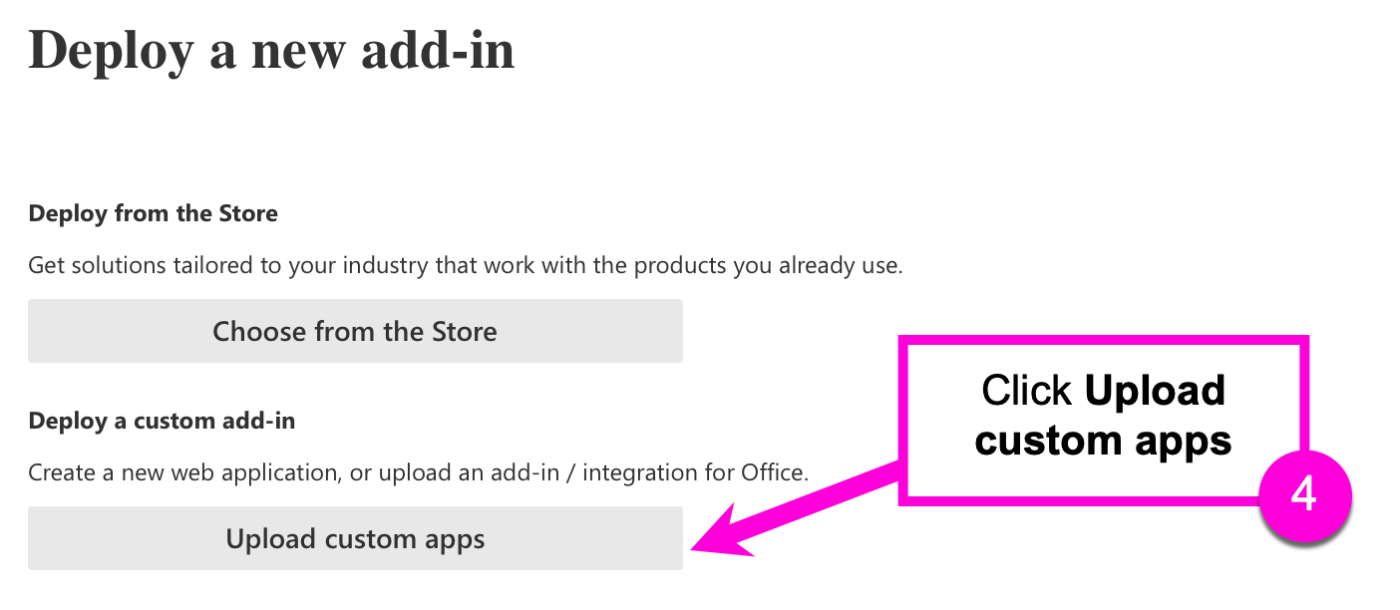
Step 4: Click Upload custom apps.
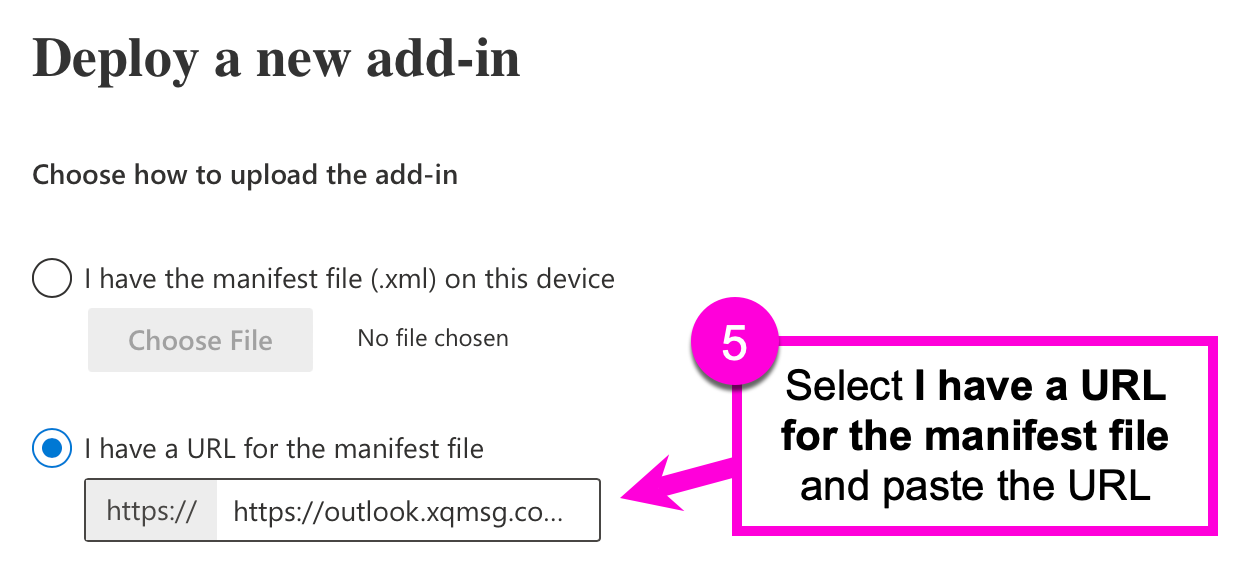
Step 5: Select I have a URL for the manifest file. Copy the following URL: https://outlook.xqmsg.com/v7/manifest-admin.xml and paste the URL in the text box.
Click Upload.
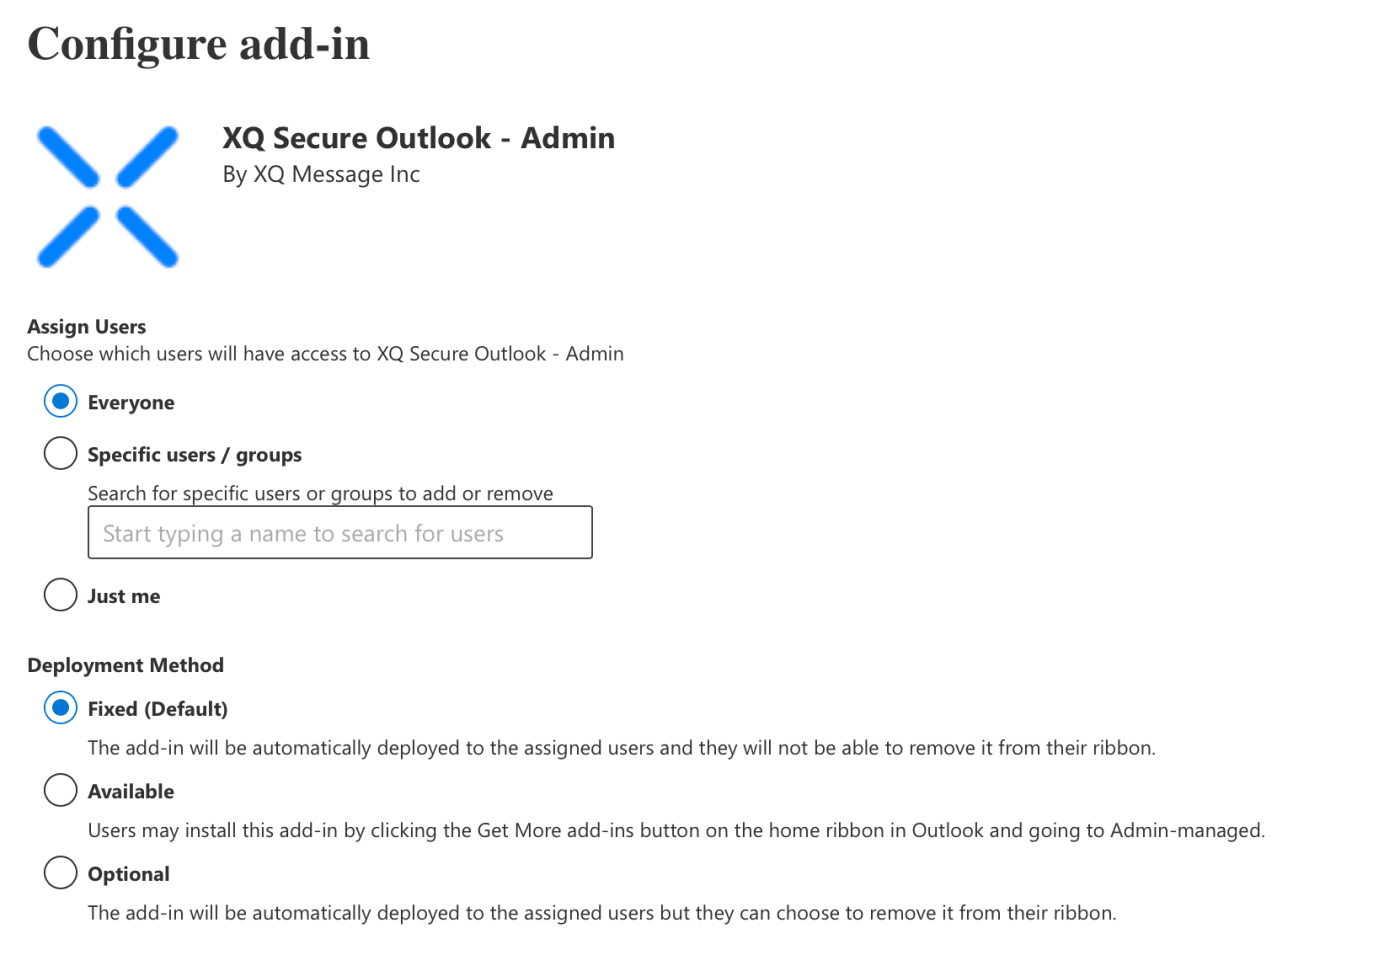
Step 6: On the configuration page choose an option under Assign Users and select a Deployment Method.
Click Deploy to start the installation.
Note: It will take up to 12 hours for the add-in to be displayed on users' ribbons. Users might need to relaunch Office.
Install through the Add-in library
Step 1: Sign in to the Microsoft 365 admin. Open the sidebar navigation menu, click Settings and select Integrated apps.
Step 2: From the Integrated apps page, click Add-ins.
Step 3: From the Add-ins page, click Deploy Add-In.
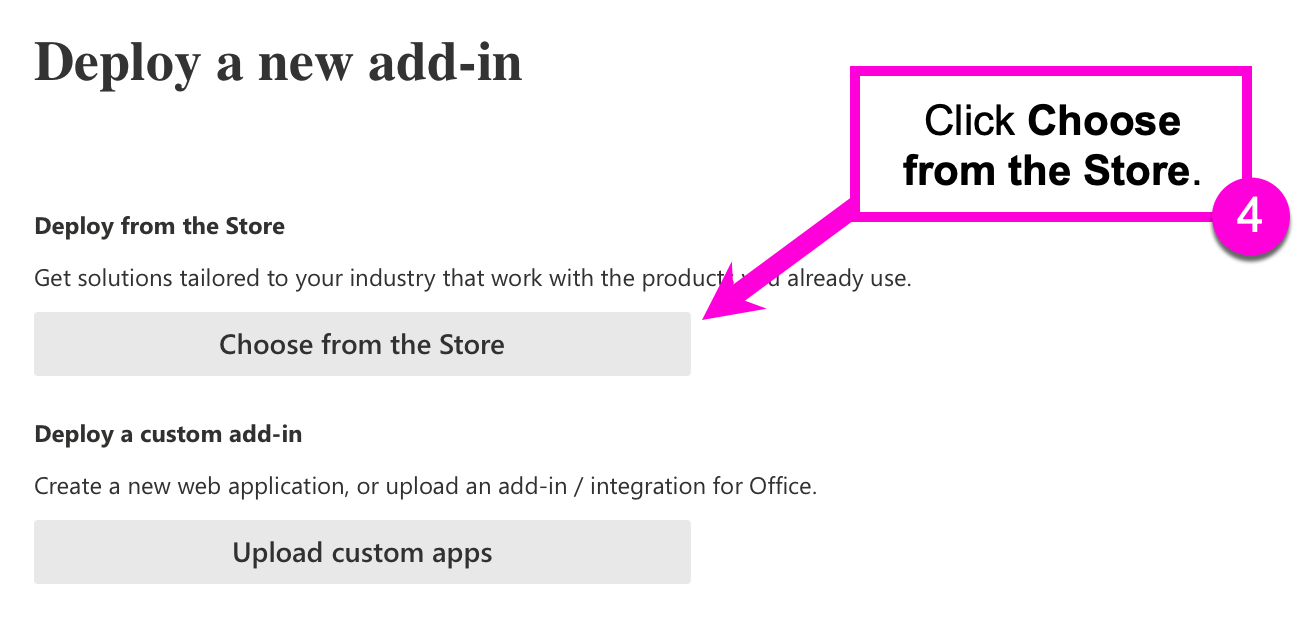
Step 4: Click Choose from the Store.
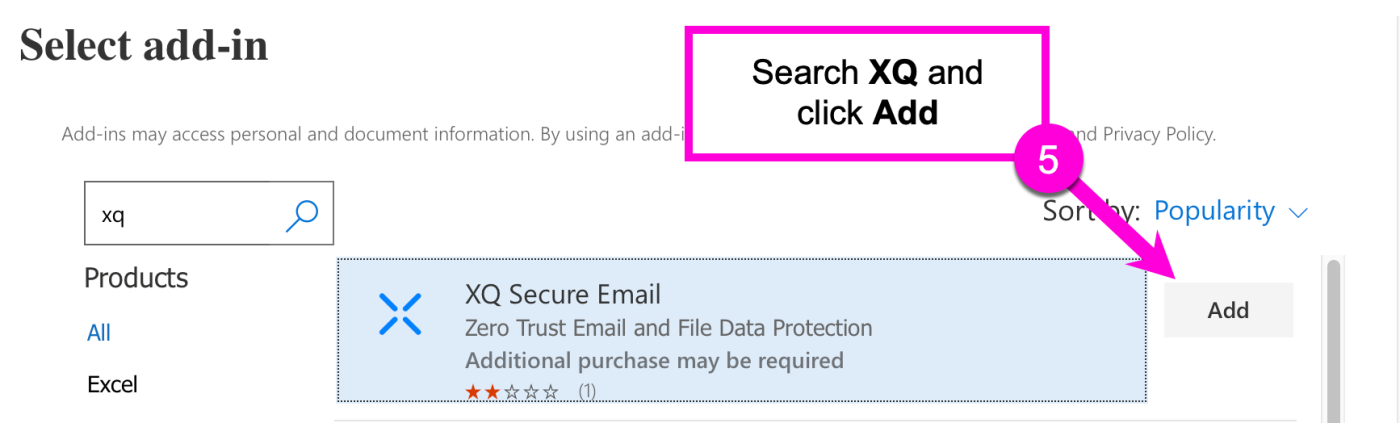
Step 5: Use the search bar to search for XQ and click Add.
Click Continue to accept the Privacy Policy.
Step 6: On the configuration page choose an option under Assign Users and select a Deployment Method.
Click Deploy to start the installation.
Note: It will take up to 12 hours for the add-in to be displayed on users' ribbons. Users might need to relaunch Office.
Next steps
- To add team members, see How to Add Team Members.
- Group users must complete the following steps to complete setup: Install the Secure Outlook Add-in.